Tuesday, April 2, 2013
Time for Egg Hunting - FTU
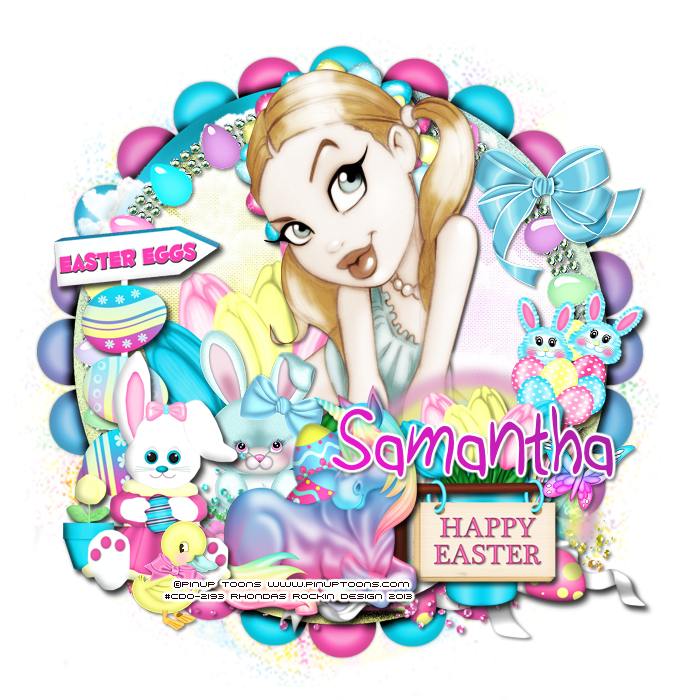
Supplies Needed:
Tube of choice: Im using the wonderful art work of Pinup Toons
Which you must obtain a license to use at CDO HERE
FTU Cluster Frame by Aussie Angel HERE
FTU kit by Mary called Rainbowlicious Easter HERE
Mask of choice
Please leave some love when you download..A little thanks goes a long way
Xero Radiance
Open cluster frame - shift D and close original
canvas size 700x700
Grab the freehand tool and draw around the frame
Open paper 6, selections invert delete
Move paper under frame
apply Xero Radiance
I used the following:
Bow 2
Bunny 1
Butterfly 3
Clouds
Ducky
Easter Egg 1&2
Eggs & Tulips
Frame 5
Open paper 1 & apply mask
Add the Copyright and your License Number for the tube
Resize to your liking and save as PNG
This tutorial was created on April 1,2013 by Rhonda
Any resemblance to another Tag or Tutorial is purely coincidental


Monday, April 1, 2013
Thinking of Spring - FTU

Supplies Needed:
Tube of choice: Im using the wonderful art work of Pinup Toons
You can purchase these tubes at CDO HERE
FTU Scrap Kit by Amy from Gimptastic Tuts HERE
Template #2 by Brutal Designs HERE
Mask of choice
Don't forget to leave a thank you when downloading
Xero Radiance
Open template - Shift D to duplicate then close out original
Canvas size 700x700
Deleted copyright & flowers
paste a paper of choice from the kit - I used paper7
selection invert delete
select none delete the original
paste a paper of choice from the kit - I used paper4
selection invert delete
select none delete the original
paste a paper of choice from the kit - I used paper5
selection invert delete
select none delete the original
paste a paper of choice from the kit - I used paper6
selection invert delete
select none delete the original
paste a paper of choice from the kit - I used paper3
selection invert delete
select none delete the original
Xero radiance with settings of choice
I used the following:
Bushes
Butterfly 1&2
Chick
Eggpot
Fence
Pinwheel
Scatter
Sun
Tree Wordart
Worm
Open paper 8 and apply mask of choice
Add the Copyright and your License Number for the tube
Resize to your liking and save as PNG
This tutorial was created on April 1,2013 by Rhonda
Any resemblance to another Tag or Tutorial is purely coincidental
Rock and Roll Princess - PTU

Supplies Needed:
Tube of choice: Im using the wonderful art work of VeryMany
You can purchase these tubes at Pics for Design HERE
PTU Scrap Kit by Nicky from Inzpired Creationz called "Beatz Street"
You an purchase this awesome kit at SATC HERE
Don't forget to leave a thank you when downloading
Xero Radiance
Eyecandy Gradient Glow
Open template - Shift D to duplicate then close out original
Delete copyright layer & bracket
paste a paper of choice from the kit - I used paper13
selection invert delete
select none delete the original
paste a paper of choice from the kit - I used paper8
selection invert delete
select none delete the original
paste a paper of choice from the kit - I used paper1
selection invert delete
select none delete the original
paste a paper of choice from the kit - I used paper2
selection invert delete
select none delete the original
paste a paper of choice from the kit - I used paper6
selection invert delete
select none delete the original
paste a paper of choice from the kit - I used paper3
selection invert delete
select none delete the original
add closeup of tube inside the frame
selection invert delete
select none delete the original
apply Xero Radiance with settinggs of choice
paste a paper of choice from the kit - I used paper1
selection invert delete
select none delete the original
paste a paper of choice from the kit - I used paper4
selection invert delete
select none delete the original
apply Eyecandy Gradient Glow
Add Xero Radiance with settings of choice
I used the following:
Boombox
Frame 2
Lolli 1&3
Skates
Sneeks
Sparkels 2
Speakers
Spray Can 1
Add the Copyright and your License Number for the tube
Resize to your liking and save as PNG
This tutorial was created on April 1, 2013 by Rhonda
Any resemblance to another Tag or Tutorial is purely coincidental
Subscribe to:
Posts (Atom)
My Blinkie

My Licenses

