Showing posts with label Tutorials - PTU. Show all posts
Showing posts with label Tutorials - PTU. Show all posts
Sunday, April 7, 2013
Crazy Madness - PTU

Supplies Needed:
Tube of choice: Im using the wonderful art work of Zlata_M
Which you must obtain a license to use at Pic for Design HERE
PTU Scrap Kit by Jen from Sweet Temptations called "Madness"
You an purchase this awesome kit HERE
Template #1 by Chrissy from Chrissy Chaos HERE
Don't forget to leave a thank you when downloading
Xero Radiance
Open template - Shift D to duplicate then close out original
Resize all layers 85%
Canvas size 700x700
delete copyright
paste a paper of choice from the kit - I used paper6
selection invert delete
select none delete the original
paste a paper of choice from the kit - I used paper8
selection invert delete
select none delete the original
paste a paper of choice from the kit - I used paper9
selection invert delete
select none delete the original
paste a paper of choice from the kit - I used paper11
selection invert delete
select none delete the original
paste a paper of choice from the kit - I used paper3
selection invert delete
select none delete the original
paste a paper of choice from the kit - I used paper5
selection invert delete
select none delete the original
paste a paper of choice from the kit - I used paper2
selection invert delete
select none delete the original
paste a paper of choice from the kit - I used paper7
selection invert delete
select none delete the original
paste a paper of choice from the kit - I used paper12
selection invert delete
select none delete the original
paste a paper of choice from the kit - I used paper2
selection invert delete
select none delete the original
Xero Radiance with settings of choice
I used the following:
Bird
Bomb
Bow 1
Cake
Camera
Centerpiece
Cupcake 1
Film 2
Gumball
Journal
Kitten
Lips
Mask
MP3
Pillow
Add the Copyright and your License Number for the tube
Resize to your liking and save as PNG
This tutorial was created on April 7, 2013 by Rhonda
Any resemblance to another Tag or Tutorial is purely coincidental


Saturday, April 6, 2013
Rock Angel - PTU

Supplies Needed:
Tube of choice: Im using the wonderful art work of Elias Chatzoudis
This tube was purchased at PTE which has closed
You can purchas his tubes at his own store HERE
PTU Scrap Kit by Tamie called "Beat Babe"which you can purchase at her store HERE
Mask of choice
Don't forget to leave a thank you when downloading
Xero Radiance
PhotoEffex Scanlines
Eyecandy Gradient Glow
Open template - Shift D to duplicate then close out original
delete copyright
paste a paper of choice from the kit - I used paper1
selection invert delete
select none delete the original
paste a paper of choice from the kit - I used paper2
selection invert delete
select none delete the original
paste a paper of choice from the kit - I used paper6
selection invert delete
select none delete the original
paste a paper of choice from the kit - I used paper7
selection invert delete
select none delete the original
paste a paper of choice from the kit - I used paper4
selection invert delete
select none delete the original
add new layer and flood fill with gradient of choice
select none delete the original
apply Eyecandy Gradient Glow
apply Xero Radiance with settings of choice
apply PhotoEffex Scanlines
apply Eyecandy gradient Glow
Xero Radiance with settings of choice
Bow 5
Bubbles
Button 1&2
Cassette
CD 2
Fluffy Heart
Lights 2
Netting
Ribbon 2
Splatter
Starsscatter
Tag
Open paper 9 & apply mask mask
Add the Copyright and your License Number for the tube
Resize to your liking and save as PNG
This tutorial was created on April 6,2013 by Rhonda
Any resemblance to another Tag or Tutorial is purely coincidental
Friday, April 5, 2013
Spring Sunrise - PTU

Supplies Needed:
Tube of choice: Im using the wonderful art work of Jennifer Janesko
This tube was purchased at CILM which has now closed
You can purchase her tubes at CDO HERE
PTU Scrap Kit by Laura from Tiny Turtle Design called "Spring Sunrise"
You an purchase this awesome kit at SATC HERE
Mask of choice
Xero Radiance
Open blank canvas 700x700
Open element 20 & place as a new layer
Grab the magic wand & click inside frame
Selections modify expand by 5
Open paper 13 and place as a new layer
selections invert delete
move paper under frame
Place tube iside the frame
Apply Xero Radiance with settings of choice
I used:
Element 3
Element 11
Element 14
Element 17
Element 26
Element 29
Element 30
Element 41
Element 55
Element 57
Element 61
Element 64
Element 79
Add the Copyright and your License Number for the tube
Resize to your liking and save as PNG
This tutorial was created on April 5,2013 by Rhonda
Any resemblance to another Tag or Tutorial is purely coincidental
Thursday, April 4, 2013
Pampered Pup - PTU

Supplies Needed:
Tube of choice: Im using the wonderful art work of Maryline Cazenave
You can purchase her tubes at CDO HERE
PTU Scrap Kit by Nicky from Inzpired Creationz called "Pampered Pup"
You an purchase this awesome kit from SATC HERE
Template by me HERE
Mask of choice
Don't forget to leave a thank you when downloading
Xero Radiance
Xero Fritillary
Eyecandy Gradient Glow
Open template - Shift D to duplicate then close out original
Canvas size 700x700
delete copyright, raster 4,raster 7 & copy of raster 4
paste a paper of choice from the kit - I used paper3
selection invert delete
select none delete the original
paste a paper of choice from the kit - I used paper11
selection invert delete
select none delete the original
paste a paper of choice from the kit - I used paper13
selection invert delete
select none delete the original
paste closeup of tube you are using
selection invert delete
select none delete the original
Apply Xero Radiance with settings of choice
add new layer and flood fill with gradient of choice
select none delete the original
apply Eyecandy Gradient Glow
apply Xero Fritillary with settings fo choice
Xero Radiance with settings of choice
Cupcake 1&2
Diamond
Dog Brush
Dog Collar
Dog Dish
Dog Shampoo
Flowers 1
Frame 1
Heart 1
Heart String 1
Lolli 1&3
Pillow
Ring
Sparkles 3
Tulle 1
Open paper 8 & apply mask
Add the Copyright and your License Number for the tube
Resize to your liking and save as PNG
This tutorial was created on April 2,2013 by Rhonda
Any resemblance to another Tag or Tutorial is purely coincidental
Monday, April 1, 2013
Rock and Roll Princess - PTU

Supplies Needed:
Tube of choice: Im using the wonderful art work of VeryMany
You can purchase these tubes at Pics for Design HERE
PTU Scrap Kit by Nicky from Inzpired Creationz called "Beatz Street"
You an purchase this awesome kit at SATC HERE
Don't forget to leave a thank you when downloading
Xero Radiance
Eyecandy Gradient Glow
Open template - Shift D to duplicate then close out original
Delete copyright layer & bracket
paste a paper of choice from the kit - I used paper13
selection invert delete
select none delete the original
paste a paper of choice from the kit - I used paper8
selection invert delete
select none delete the original
paste a paper of choice from the kit - I used paper1
selection invert delete
select none delete the original
paste a paper of choice from the kit - I used paper2
selection invert delete
select none delete the original
paste a paper of choice from the kit - I used paper6
selection invert delete
select none delete the original
paste a paper of choice from the kit - I used paper3
selection invert delete
select none delete the original
add closeup of tube inside the frame
selection invert delete
select none delete the original
apply Xero Radiance with settinggs of choice
paste a paper of choice from the kit - I used paper1
selection invert delete
select none delete the original
paste a paper of choice from the kit - I used paper4
selection invert delete
select none delete the original
apply Eyecandy Gradient Glow
Add Xero Radiance with settings of choice
I used the following:
Boombox
Frame 2
Lolli 1&3
Skates
Sneeks
Sparkels 2
Speakers
Spray Can 1
Add the Copyright and your License Number for the tube
Resize to your liking and save as PNG
This tutorial was created on April 1, 2013 by Rhonda
Any resemblance to another Tag or Tutorial is purely coincidental
Sunday, March 31, 2013
Rainbow Beauty - PTU

Supplies Needed:
Tube of choice: Im using the wonderful art work of Lady Mishka
I bought this tube about a year ago when she was selling at SATC
She left but has returned with more awesome tubes
You must obtain a license to use this art at SATC HERE
PTU Scrap Kit by Wicked Princess called "Cupcake Rainbow"
You an purchase this awesome kit at Designer Scraps HERE
Template by TallChic D-Zines HERE
Don't forget to leave a thank you when downloading
Xero Radiance
Open template - Shift D to duplicate then close out original
Canvas 700x700
Delete copyright,wordart & back
paste a paper of choice from the kit - I used paper10
selection invert delete
select none delete the original
add noise
paste a paper of choice from the kit - I used paper7
selection invert delete
select none delete the original
paste a paper of choice from the kit - I used paper5
selection invert delete
select none delete the original
paste a paper of choice from the kit - I used paper14
selection invert delete
select none delete the original
paste a paper of choice from the kit - I used paper19
selection invert delete
select none delete the original
paste a paper of choice from the kit - I used paper6
selection invert delete
select none delete the original
add close-up of tubes you are using
selection invert delete
select none delete the original
apply Xero Radiance
paste a paper of choice from the kit - I used paper9
selection invert delete
select none delete the original
add noise
applyd Xero Radiance again
I used the following:
Butterfly 1&2
Cakepop
Candy 1&2
Cupcake 2,3,4&10
Flower 1
Gumdrop
Heart Frame
Mum
Rose 1&2
Sucker 3
Merge your layers
Add the Copyright and your License Number for the tube
Resize to your liking and save as PNG
This tutorial was created on March 31,2013 by Rhonda
Any resemblance to another Tag or Tutorial is purely coincidental
Jensen SteamPunk - PTU

Supplies Needed:
Tube of choice: Im using the wonderful art work of Barbara Jensen
You can purchase her tubes at her store HERE
PTU Scrap Kit by Mizteeque from called "SteamPunk"
You an purchase this awesome kit HERE
Template #30 by TwyztedT's Playroom HERE
Don't forget to leave a thank you when downloading
Xero Radiance
Open template - Shift D to duplicate then close out original
Resize all layers 83%
Canvas size 700x700
Delete copyright, copy of raster 6&8, raster 11
paste a paper of choice from the kit - I used paper7
selection invert delete
select none delete the original
paste a paper of choice from the kit - I used paper10
selection invert delete
select none delete the original
paste a paper of choice from the kit - I used paper12
selection invert delete
select none delete the original
add close up of tube you are using
selection invert delete
select none delete the original
apply Xero Radiance with setting of choice
paste a paper of choice from the kit - I used paper5
selection invert delete
select none delete the original
apply Xero Radiance with setting of choice
I used the following:
Element 5
Element 9
Element 12
Element 13
Element 16
Element 22
Element 24
Element 25
Element 27
Element 29
Element 35
Element 36
Add the Copyright and your License Number for the tube
Resize to your liking and save as PNG
This tutorial was created on March 31,2013 by Rhonda
Any resemblance to another Tag or Tutorial is purely coincidental
Sunday, March 24, 2013
Sweet Easter Toon - PTU

Supplies Needed:
Tube of choice: Im using the wonderful art work of Pinup Toons
You can find his art at CDO HERE
PTU Scrap Kit by Jen from Sweet Temptations called "A Sweet Easter"
You an purchase this awesome kit HERE
Easter Template #1 by Flaminsal HERE
Mask of choice
Don't forget to leave a thank you when downloading
Xero Porcelin
Open template - Shift D to duplicate then close out original
delete copyright
paste a paper of choice from the kit - I used paper1
selection invert delete
select none delete the original
add new layer & flood fill with light pink
select none delete the original
paste a paper of choice from the kit - I used paper4
selection invert delete
select none delete the original
add 2 colors of choice on new layer
select none delete the original
add texture of choice
paste a paper of choice from the kit - I used paper14
selection invert delete
select none delete the original
paste a paper of choice from the kit - I used paper9
selection invert delete
select none delete the original
apply Xero Porcelin with settings fo choice
I used the following:
Bear 3
BFly 1
Bunny 2&3
Chick
Cupcake 3
Egg Chicks
Egg
Flowers 1,5&6
Sign
Tulips
Open paper 6 & apply mask of choice
Add the Copyright and your License Number for the tube
Resize to your liking and save as PNG
This tutorial was created on March 24, 2013 by Rhonda
Any resemblance to another Tag or Tutorial is purely coincidental
What A Girl Wants - PTU

Supplies Needed:
Tube of choice: Im using the wonderful art work of VeryMany
You can purchase these tubes at their store HERE
PTU Scrap Kit by Jen from Sweets Temptations called "What A Girl Wants"
You an purchase this awesome kit HERE
Template #191 by Kristin from Toxic Desirez HERE
Mask of choice
Don't forget to leave a thank you when downloading
Xero Radiance
Open template - Shift D to duplicate then close out original
Resize 90% all layers
Canvas size 700x700
delete copyright & copy of raster 8 layer
paste a paper of choice from the kit - I used paper10
selection invert delete
select none delete the original
paste a paper of choice from the kit - I used paper2
selection invert delete
select none delete the original
paste a paper of choice from the kit - I used paper8
selection invert delete
select none delete the original
paste a paper of choice from the kit - I used paper8
selection invert delete
select none delete the original
paste a paper of choice from the kit - I used paper4
selection invert delete
select none delete the original
paste a paper of choice from the kit - I used paper7
selection invert delete
select none delete the original
paste a paper of choice from the kit - I used paper3
selection invert delete
select none delete the original
add new layer - open paper 9 and paste into selections
select none delete the original
Xero radiance with settings of choice
I used the following:
Cake
Cushion
Flower 2
Hearts
Ipod
Lipstick
Lock
Lollipop
LoveLetter
MP3
Nailpolish
Shoe
Unicorn
Open paper 2 & apply mask of choice
Add the Copyright and your License Number for the tube
Resize to your liking and save as PNG
This tutorial was created on March 24,2013 by Rhonda
Any resemblance to another Tag or Tutorial is purely coincidental
Heavenly Peace - PTU

Supplies Needed:
Tube of choice: Im using the wonderful art work of VeryMany
Which you must obtain a license to use at Pic for Design HERE
PTU Scrap Kit by Jen from Sweet Temptations called "Heavenly"
You an purchase this awesome kit HERE
Template #93 by Kimberly from Bookworm Dezines HERE
Template downloads are on the left side of blog
Mask of choice
Don't forget to leave a thank you when downloading
Xero Radiance
Open template - Shift D to duplicate then close out original
Canvas size 700x700
delete copyright
paste a paper of choice from the kit - I used paper10
selection invert delete
select none delete the original
paste a paper of choice from the kit - I used paper5
selection invert delete
select none delete the original
paste a paper of choice from the kit - I used paper1
selection invert delete
select none delete the original
paste a paper of choice from the kit - I used paper6
selection invert delete
select none delete the original
paste a paper of choice from the kit - I used paper1
selection invert delete
select none delete the original
paste a paper of choice from the kit - I used paper8
selection invert delete
select none delete the original
open paper 3 & paste into selection
select none
paste a paper of choice from the kit - I used glitter 4
selection invert delete
select none delete the original
add noise of choice
Dupliace then mirror
place closeup of tube you are using inside the frame
apply Xero Radiance with settings of choice
see my tag for example
Xero Radiance with settings of choice
I used the following:
Butterfly
Bird1
Bling
Cloud
Flower
Harp
Heart
Sheer
Tag 2
Open paper of choice and apply any mask
Add the Copyright and your License Number for the tube
Resize to your liking and save as PNG
This tutorial was created on March 24, 2013 by Rhonda
Any resemblance to another Tag or Tutorial is purely coincidental
Friday, March 22, 2013
My Sweetness - PTU

Supplies Needed:
Tube of choice: Im using the wonderful art work of Keith Garvey
You can purchase these tubes at his own store HERE
PTU Scrap Kit by Nicky from Inzpired Creationz called "Sweet and Tender"
You an purchase this awesome kit from SATC HERE
My Sweetness Template by Flaminsal from Fired By Flamin HERE
Mask of choice
Don't forget to leave a thank you when downloading
Xero Radiance
PhotoEffex Scanlines
Open template - Shift D to duplicate then close out original
Delete copyright & wordart shadow
paste a paper of choice from the kit - I used paper2
selection invert delete
select none delete the original
paste a paper of choice from the kit - I used paper10
selection invert delete
select none delete the original
paste a paper of choice from the kit - I used paper3
selection invert delete
select none delete the original
paste a paper of choice from the kit - I used paper9
selection invert delete
select none delete the original
paste a paper of choice from the kit - I used paper11
selection invert delete
select none delete the original
apply Xero Radiance with settings of choice
apply Photoeffex Scanlines
apply border with darker color
Xero Radiance with settings of choice
I used the following:
Butterfly 1&3
Candy 1,3&4
Card 2
Champs
Flower 1
Gifts
Ribbon 2
Sparkles 1
Tag
Apply mask of choice
Add the Copyright and your License Number for the tube
Resize to your liking and save as PNG
This tutorial was created on March 22,2013 by Rhonda
Any resemblance to another Tag or Tutorial is purely coincidental
Thursday, March 21, 2013
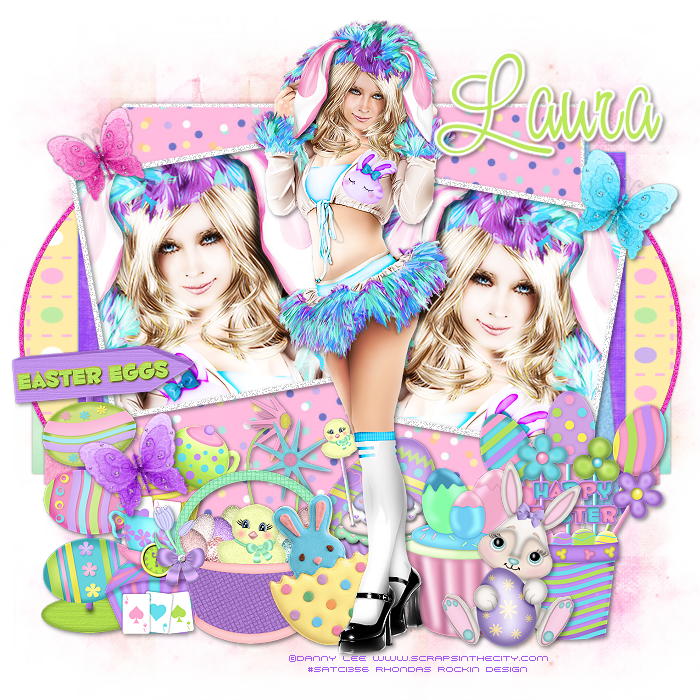
Fluffy Easter Bunny - PTU
Supplies Needed:
Tube of choice: Im using the wonderful art work of Danny Lee
You must obtain a license to use her art at SATC HERE
PTU Scrap Kit by Laura from Tiny Turtle Design called "Coralie"
You an purchase this awesome kit at SATC HERE
Template #380 by Missy Kandi from Divine Intentionz HERE
Mask #22 by Gems Taggin Scraps HERE
Don't forget to leave a thank you when downloading
Xero Radiance
Ok Lets get Started:
Open template - Shift D to duplicate then close out original
Canvas 700x700
Delete copyright,all wordart & all shadow layers
paste a paper of choice from the kit - I used paper37
selection invert delete
select none delete the original
paste a paper of choice from the kit - I used paper1
selection invert delete
select none delete the original
paste a paper of choice from the kit - I used paper36
selection invert delete
select none delete the original
paste a paper of choice from the kit - I used paper39
selection invert delete
select none delete the original
paste a paper of choice from the kit - I used paper35
selection invert delete
select none delete the original
paste a paper of choice from the kit - I used paper24
selection invert delete
select none delete the original
add close up of tube you are using
apply Xero Radiance with settings of choice
Apply Xero Radiance again
I used the following:
Element 4
Element 5
Element 6
Element 7
Element 8
Element 11
Element 12
Element 22
Element 23
Element 35
Element 40
Element 41
Element 48
Open paper 38 & apply mask
Add the Copyright and your License Number for the tube
Resize to your liking and save as PNG
This tutorial was created on March 21,2013 by Rhonda
Any resemblance to another Tag or Tutorial is purely coincidental
Wednesday, March 20, 2013
Please Don't Stop the Music - PTU

Supplies Needed:
Tube of choice: Im using the wonderful art work of VeryMany
You must obtain a license to use this art at PFD HERE
PTU Scrap Kit by Lexi Creationz Scrapz called "Punk'd"
You an purchase this awesome kit at Designer Scraps HERE
Template #130 by Rachel from Scraps of Enchantment HERE
Don't forget to leave a thank you when downloading
Xero Radiance
Open template - Shift D to duplicate then close out original
Canvas 700x700
Delete copyright & stars
paste a paper of choice from the kit - I used paper3
selection invert delete
select none delete the original
paste a paper of choice from the kit - I used paper1
selection invert delete
select none delete the original
paste a paper of choice from the kit - I used paper8
selection invert delete
select none delete the original
add noise
paste a paper of choice from the kit - I used paper6
selection invert delete
select none delete the original
On the frames I added a gradient with noise
Add Xero Radiance with settings of choice
I used the following:
Element 1
Element 2
Element 3
Element 4
Element 10
Element 12
Element 13
Element 18
Element 23
Element 24
Element 37
Element 42
Add the Copyright and your License Number for the tube
Resize to your liking and save as PNG
This tutorial was created on March 20,2013 by Rhonda
Any resemblance to another Tag or Tutorial is purely coincidental
Tuesday, March 19, 2013
Special Gift - PTU

Supplies Needed:
Tube of choice: Im using the wonderful art work of Roman Zaric
You can purchase his tubes at his store HERE
PTU Scrap Kit by Mizteeque from called "Dark Passion"
You an purchase this awesome kit HERE
Template #80 by Tami from Addictive Pleasures HERE
Don't forget to leave a thank you when downloading
Xero Radiance
Xero Fritillary
Toadies Band Suppressing Noise
Open template - Shift D to duplicate then close out original
Resize 85% all layers
Canvas size 700x700
Delete copyright & 2 heart layers on each side
paste a paper of choice from the kit - I used paper10
selection invert delete
select none delete the original
paste a paper of choice from the kit - I used paper2
selection invert delete
select none delete the original
add new layer & flood fill with gradient
apply Xero Fritillary with settings of choice
select none delete the original
add new layer & flood fill with solid color
apply Toadies Band Suppressing Noise with settings of choice
select none delete the original
use the Hue & Saturation effect to colorize your wordart
apply Xero Raiance with settings of choice
I used the following:
Element 2
Element 11
Element 15
Element 32
Element 40
Add the Copyright and your License Number for the tube
Resize to your liking and save as PNG
This tutorial was created on March 19,2013 by Rhonda
Any resemblance to another Tag or Tutorial is purely coincidental
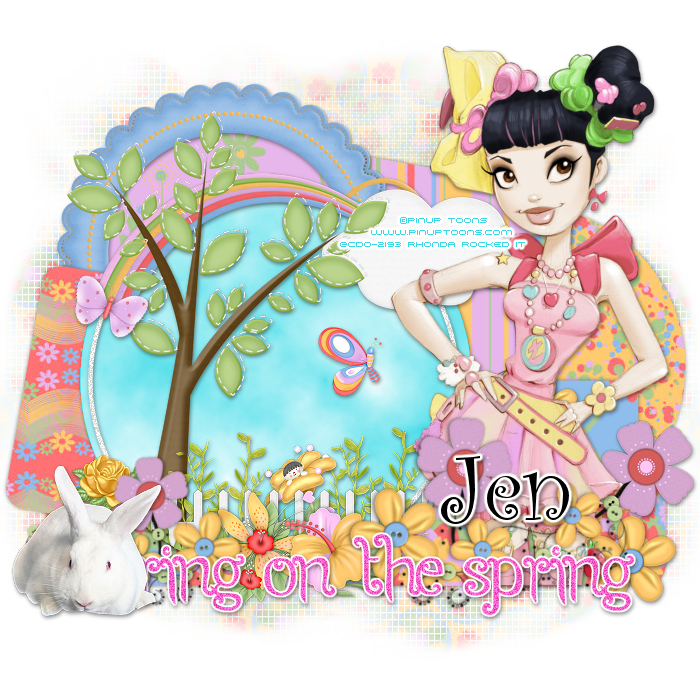
Bring on the Spring - PTU
Supplies Needed:
Tube of choice: Im using the wonderful art work of Pinup Toons
Which you must obtain a license to use at CDO HERE
PTU Scrap Kit by Jen from Sweet Temptations called "Spring Dreams"
You an purchase this awesome kit HERE
Template #212 by Millie HERE
Mask #017 by Vix - it is one of the big masks HERE
Don't forget to leave a thank you when downloading
Mura Meister Clouds
Open template - Shift D to duplicate then close out original
Canvas size 700x700
delete copyright
paste a paper of choice from the kit - I used paper12
selection invert delete
select none delete the original
paste a paper of choice from the kit - I used paper3
selection invert delete
select none delete the original
paste a paper of choice from the kit - I used paper9
selection invert delete
select none delete the original
paste a paper of choice from the kit - I used paper11
selection invert delete
select none delete the original
paste a paper of choice from the kit - I used paper8
selection invert delete
select none delete the original
paste a paper of choice from the kit - I used paper10
selection invert delete
select none delete the original
apply Mura Meister Clouds with settings of choice
Xero Radiance with settings of choice
I used the following:
Butterfly 1&2
Fence
Flowers 1,2,3&4
Flower 10
Frame 3
Grass 1&2
Rabbit
Rainbow
Tree
Open paper 7 and apply mask
Add the Copyright and your License Number for the tube
Resize to your liking and save as PNG
This tutorial was created on March 19, 2013 by Rhonda
Any resemblance to another Tag or Tutorial is purely coincidental
Sunday, March 17, 2013
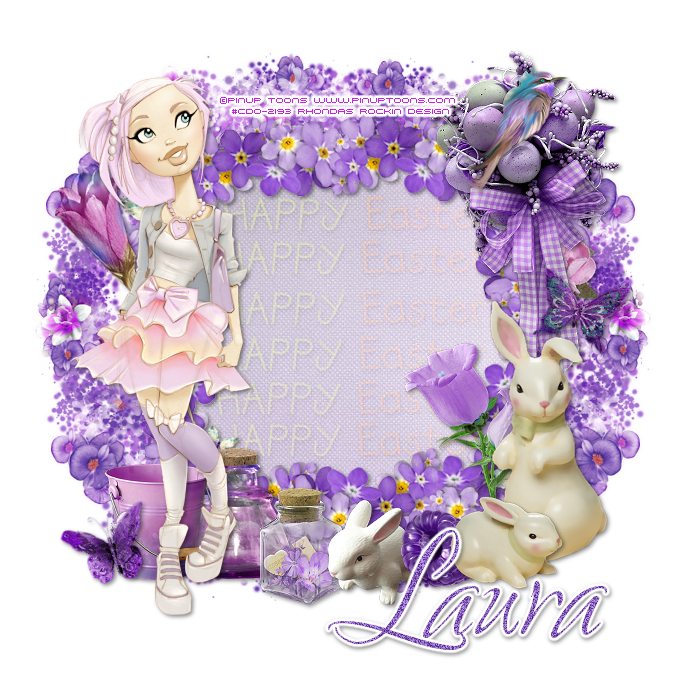
Bunny Meadow - PTU
Supplies Needed:
Tube of choice: Im using the wonderful art work of Pinup Toons
You must obtain a license to use these tubes at CDO HERE
PTU Scrap Kit by Laura from Tiny Turtle Design called "Bunny Meadows"
You an purchase this awesome kit at SATC HERE
Wordart HERE
Open blank canvas 700x700
Open element 86 & place as a new layer
Place your main tube to left of frame
Add Xero Radiance
Grab the freehand tool and draw aound the frame
Open paper 23 and place as a new layer
selections invert delete
move paper under frame
Open element 88 and place under frame
Move to the left - duplicate amd mirror
arrange this how you want it to look then merge the two together
duplicate and flip - arrange on the bottom
Open the Happy Easter wordart & resize
place in center of frame
change overlay to soft light & dropshadow
duplicate several times till frame is full
I used:
Element 21
Element 23
Element 30
Element 31
Element 46
Element 59
Element 74
Element 87
Element 93
Element 94
Element 105
Element 107
Element 108
Add the Copyright and your License Number for the tube
Resize to your liking and save as PNG
This tutorial was created on March 17,2013 by Rhonda
Any resemblance to another Tag or Tutorial is purely coincidental
Happy Easter - PTU

Supplies Needed:
Tube of choice: Im using the wonderful art work of Keith Garvey
This tube was purchased at PTE which has closed
You can find his art HERE
PTU Scrap Kit by Jen from Sweet Temptations called "Eggsposed"
You an purchase this awesome kit HERE
Easter Template #4 by Flaminsal HERE
Mask #157 by Vaybs HERE
Don't forget to leave a thank you when downloading
Xero Radiance
Open template - Shift D to duplicate then close out original
delete copyright,wordart & small flower
paste a paper of choice from the kit - I used paper2
selection invert delete
select none delete the original
paste a paper of choice from the kit - I used paper4
selection invert delete
select none delete the original
paste a paper of choice from the kit - I used paper3
selection invert delete
select none delete the original
paste a paper of choice from the kit - I used paper7
selection invert delete
select none delete the original
paste a paper of choice from the kit - I used paper8
selection invert delete
select none delete the original
add noise with settings of choice
paste a paper of choice from the kit - I used paper6
selection invert delete
select none delete the original
apply Xero Radiance with settings fo choice
I used the following:
Balloons
Basket
Bow 1
Duck
Flower 5
Happy Easter
Hippity Hop Sign
Racing Duck
Train
Open paper 1 & apply mask of choice
Add the Copyright and your License Number for the tube
Resize to your liking and save as PNG
This tutorial was created on March 17, 2013 by Rhonda
Any resemblance to another Tag or Tutorial is purely coincidental
Friday, March 15, 2013
Daydreamer - PTU

This tube was purchased at MPT which has closed
You can find his art HERE
PTU Scrap Kit by Jen from Sweet Temptations called "Daydreamer"
You an purchase this awesome kit HERE
Template #40 by Rose HERE
Mask of choice
Don't forget to leave a thank you when downloading
Penta Color Dot
Open template - Shift D to duplicate then close out original
Resize template 115 all layers
Canvas size 650x650
delete copyright & layer 3
paste a paper of choice from the kit - I used paper2
selection invert delete
select none delete the original
Effects/textures/blinds with settings of choice
add a new layer and flood fill with a gradientof choice
select none delete the original
apply Penta color dot with settings of choice
I used the following:
Boombox
Bow 1
Brad 1
Dfly 1
Journal
Paperclip 1,2&3
Skateboard
Teddy
Open paper 10 & apply mask of choice
Add the Copyright and your License Number for the tube
Resize to your liking and save as PNG
This tutorial was created on March 15, 2013 by Rhonda
Any resemblance to another Tag or Tutorial is purely coincidental
Sunday, March 10, 2013
Serenity Rain - PTU

Supplies Needed:
Tube of choice: Im using the wonderful art work of Keith Garvey
You must obtain a license to use his art at his store HERE
PTU Scrapkit by Nicky from Inzpired Creationz called "Spring Serenity"
You can purchase this kit HERE
FTU Cluster frame by Julies Jazz Designz HERE
Plugins Used:
Xero Radiance
This is a very quick and easy tutroial
Open frame - Shift D to duplicate - close original
Canvas 700x700
Grab the magic wand and click inside frame
Selections modify expand by 10
Open paper 1 from kit and paste as new layer
Selections invert delete
Move paper under frame
Place close up of tube inside frame
Apply Xero Radiance with settings of choice
Add any other elements you want from the kit
I used:
Butterfly
Clouds
Rain
Sparkles 2
Add the Copyright and your License Number for the tube
Resize to your liking and save as PNG
This tutorial was created on March 10,2013 by Rhonda
Any resemblance to another Tag or Tutorial is purely coincidental
Thursday, March 7, 2013
Closeup - PTU

Supplies Needed:
Tube of choice: Im using the wonderful art work of Skyscrap Pinup
You can purchase this tube at SATC HERE
PTU Scrap Kit by Nicky from Inzpired Creationz called "Floraemo"
You an purchase this awesome kit from SATC HERE
Template #17 by Flaminsal HERE
Mask by Janice - 3rd mask HERE
Don't forget to leave a thank you when downloading
Xero Radiance
Tramages Starmaker
Xero Fritillary
Eyecandy Gradient Glow
Open template - Shift D to duplicate then close out original
Canvas size 700x700
delete copyright
paste a paper of choice from the kit - I used paper1
selection invert delete
select none delete the original
paste a paper of choice from the kit - I used paper5
selection invert delete
select none delete the original
paste a paper of choice from the kit - I used paper9
selection invert delete
select none delete the original
paste closeup of tube you are using
selection invert delete
select none delete the original
Apply Xero Radiance with settings of choice
paste a paper of choice from the kit - I used paper12
selection invert delete
select none delete the original
add new layer and flood fill with a gradient of choice
Apply Tramages Starmaker with default settings
Apply Xero Fritillary with settings of choice
selection invert delete
select none delete the original
add a new layer & flood fill with color of choice
select none delete the original
add noise
add a new layer & flood fill with gradient of choice
select none delete the original
Apply Eyecandy Gradient Glow
Xero Radiance with settings of choice
I used the following:
Candy1
Cuff
Frame 2
Halftone 1&3
Lipstick
Nail Polish
Skull 3
Sparkles
Add paper of choice & apply mask
Add the Copyright and your License Number for the tube
Resize to your liking and save as PNG
This tutorial was created on March 7,2013 by Rhonda
Any resemblance to another Tag or Tutorial is purely coincidental
Subscribe to:
Posts (Atom)
My Blinkie

My Licenses

