Showing posts with label Tutorials - FTU. Show all posts
Showing posts with label Tutorials - FTU. Show all posts
Tuesday, April 2, 2013
Time for Egg Hunting - FTU
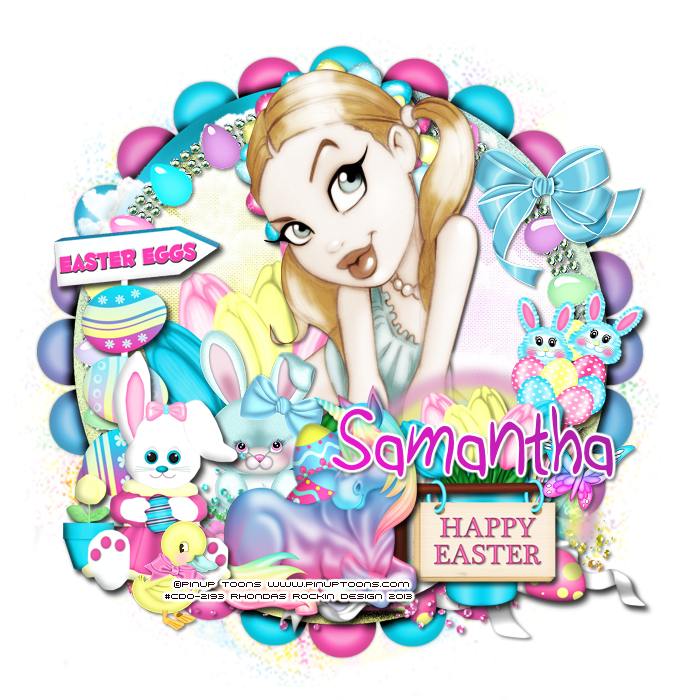
Supplies Needed:
Tube of choice: Im using the wonderful art work of Pinup Toons
Which you must obtain a license to use at CDO HERE
FTU Cluster Frame by Aussie Angel HERE
FTU kit by Mary called Rainbowlicious Easter HERE
Mask of choice
Please leave some love when you download..A little thanks goes a long way
Xero Radiance
Open cluster frame - shift D and close original
canvas size 700x700
Grab the freehand tool and draw around the frame
Open paper 6, selections invert delete
Move paper under frame
apply Xero Radiance
I used the following:
Bow 2
Bunny 1
Butterfly 3
Clouds
Ducky
Easter Egg 1&2
Eggs & Tulips
Frame 5
Open paper 1 & apply mask
Add the Copyright and your License Number for the tube
Resize to your liking and save as PNG
This tutorial was created on April 1,2013 by Rhonda
Any resemblance to another Tag or Tutorial is purely coincidental


Monday, April 1, 2013
Thinking of Spring - FTU

Supplies Needed:
Tube of choice: Im using the wonderful art work of Pinup Toons
You can purchase these tubes at CDO HERE
FTU Scrap Kit by Amy from Gimptastic Tuts HERE
Template #2 by Brutal Designs HERE
Mask of choice
Don't forget to leave a thank you when downloading
Xero Radiance
Open template - Shift D to duplicate then close out original
Canvas size 700x700
Deleted copyright & flowers
paste a paper of choice from the kit - I used paper7
selection invert delete
select none delete the original
paste a paper of choice from the kit - I used paper4
selection invert delete
select none delete the original
paste a paper of choice from the kit - I used paper5
selection invert delete
select none delete the original
paste a paper of choice from the kit - I used paper6
selection invert delete
select none delete the original
paste a paper of choice from the kit - I used paper3
selection invert delete
select none delete the original
Xero radiance with settings of choice
I used the following:
Bushes
Butterfly 1&2
Chick
Eggpot
Fence
Pinwheel
Scatter
Sun
Tree Wordart
Worm
Open paper 8 and apply mask of choice
Add the Copyright and your License Number for the tube
Resize to your liking and save as PNG
This tutorial was created on April 1,2013 by Rhonda
Any resemblance to another Tag or Tutorial is purely coincidental
Saturday, March 30, 2013
Carrot Easter - Exclusive kit for CC Forum

Thursday, March 28, 2013
Jellybean Junction - FTU

Supplies Needed:
FTU Scrap Kit by Jen from Sweet Temptations called "Jellybean Junction"
You can download this adorable kit HERE
Template #185 by Beckys Creations HERE
Mask by Jus Graphix - first mask in group HERE
Don't forget to leave a thank you when downloading
Open template - Shift D to duplicate then close out original
Canvas size 700x640
delete copyright, all stars & shadow layers
paste a paper of choice from the kit - I used paper7
selection invert delete
select none delete the original
paste a paper of choice from the kit - I used paper6
selection invert delete
select none delete the original
paste a paper of choice from the kit - I used paper1
selection invert delete
select none delete the original
paste a paper of choice from the kit - I used paper8
selection invert delete
select none delete the original
paste a paper of choice from the kit - I used paper5
selection invert delete
select none delete the original
paste a paper of choice from the kit - I used paper3
selection invert delete
select none delete the original
paste a paper of choice from the kit - I used paper4
selection invert delete
select none delete the original
I used the following:
Boat Chick
Boat Ride
Bunny 1
Cart Chick
Chick
Fence
Grass
House
Pot
Train 1
Tree 1
Trike Duck
Welcome Sign
Open paper 4 and apply mask
Add the Copyright and your License Number for the tube
Resize to your liking and save as PNG
This tutorial was created on March 28,2013 by Rhonda
Any resemblance to another Tag or Tutorial is purely coincidental
Wednesday, March 27, 2013
Pretty as Cherry Blossom - FTU
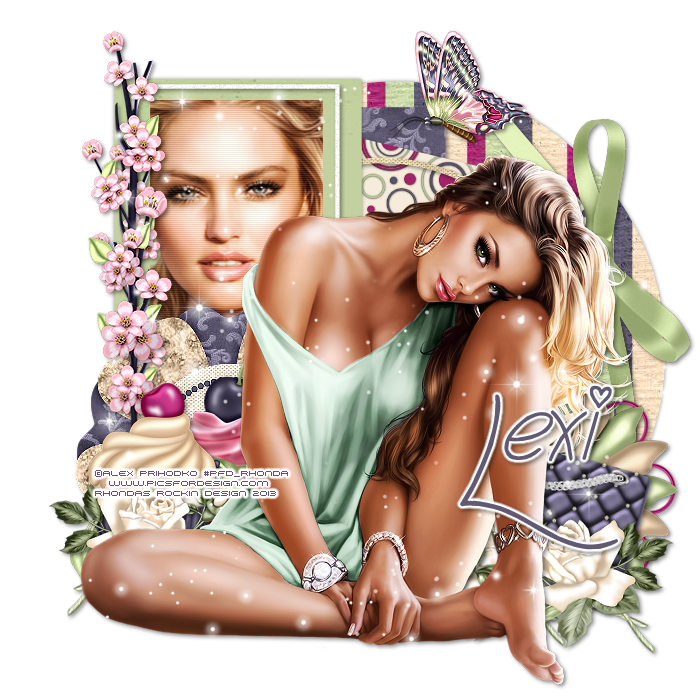
Supplies Needed:
Tube of choice: Im using the wonderful art work of Alex Prihodko
You can purchase this tube at Pics for Design HERE
FTU Exclusive Scrap Kit by Lexi - You need to like her to download kit HERE
Template #57 by Millie HERE
Don't forget to leave a thank you when downloading
Xero Radiance
PhotoEffex Scanlines
Open template - Shift D to duplicate then close out original
Canvas size 700x700
Delete the copyright,wordart,layers 5&9
paste a paper of choice from the kit - I used paper8
selection invert delete
select none delete the original
paste a paper of choice from the kit - I used paper2
selection invert delete
select none delete the original
paste a paper of choice from the kit - I used paper7
selection invert delete
select none delete the original
paste a paper of choice from the kit - I used paper6
selection invert delete
select none delete the original
paste a paper of choice from the kit - I used paper4
selection invert delete
select none delete the original
paste close-up of tube
selection invert delete
apply Xero Radiance with settings of choice
apply PhotoEffex Scanlines
Xero radiance with settings of choice
I used:
Element 1
Element 5
Element 9
Element 14
Element 16
Element 17
Element 18
Element 27
Element 29
Element 35
Add the Copyright and your License Number for the tube
Resize to your liking and save as PNG
This tutorial was created on March 27,2013 by Rhonda
Any resemblance to another Tag or Tutorial is purely coincidental
Easter Time - FTU

Supplies Needed:
Tube of choice: Im using the wonderful art work of Elias Chatzoudis
This tube was purchased at MPT which has closed
You can purchase his tubes at his store HERE
FTU Scrap Kit by Xtenziv called "Easter Naturally" HERE
Template #13 from Marilyn's Creationz HERE
Wordart from The Okie Toothfairy HERE
Don't forget to leave a thank you when downloading
Plugins Used:
Xero Radiance
Eyecandy for wordart
Open template - Shift D to duplicate then close out original
Resize all layers 80%
Canvas size 700x700
Delete copyright
paste a paper of choice from the kit - I used paper1
selection invert delete
select none delete the original
paste a paper of choice from the kit - I used paper2
selection invert delete
select none delete the original
paste a paper of choice from the kit - I used paper7
selection invert delete
select none delete the original
paste a paper of choice from the kit - I used paper3
selection invert delete
select none delete the original
paste a paper of choice from the kit - I used paper4
selection invert delete
select none delete the original
Add Eyecandy Gradient Glow
apply Xero radiance with settings of choice
I used the following:
Balloon 2
Bow 3
Easterbug
Butterfly 1&2
Easter Button 2&3
Cupcake
Eggs 1,2&3
Flower 2,3,4,6&8
Tag 1
Add the Copyright and your License Number for the tube
Resize to your liking and save as PNG
This tutorial was created on March 27,2013 by Rhonda
Any resemblance to another Tag or Tutorial is purely coincidental
Saturday, March 23, 2013
Hunnie Bunnie - FTU
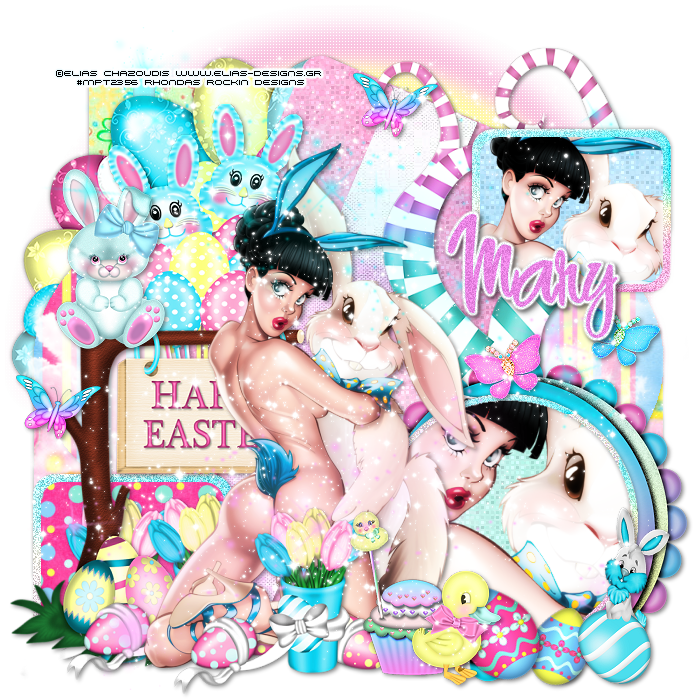
Supplies Needed:
Tube of choice: Im using the wonderful art work of Elias Chatzoudis
This tube was purchased at MPT which has closed
You must obtain a license to use this art at Elias's store HERE
FTU Scrap Kit by Mary from Sweet as Honey Creationz called "Rainbowlicious Easter" HERE
Easter Template by Samantha from Aussie Angel Creations HERE
Don't forget to leave a thank you when downloading
Plugins Used:
Xero Radiance
Weave Effect from PSP
Open template - Shift D to duplicate then close out original
Delete copyright & rabbit layers
paste a paper of choice from the kit - I used paper5
selection invert delete
select none delete the original
paste a paper of choice from the kit - I used paper1
selection invert delete
select none delete the original
paste a paper of choice from the kit - I used paper3
selection invert delete
select none delete the original
paste a paper of choice from the kit - I used paper7
selection invert delete
select none delete the original
paste a paper of choice from the kit - I used paper6
selection invert delete
select none delete the original
paste a paper of choice from the kit - I used paper8
selection invert delete
select none delete the original
apply Xero Radiance with default settings
open frame 4 and paste into selections
select none & add noise of choice
paste a paper of choice from the kit - I used paper9
selection invert delete
select none delete the original
apply Xero Radiance with default settings
paste a paper of choice from the kit - I used paper2
selection invert delete
select none delete the original
Add Xero Radiance with settings of choice
I used the following:
Bunny 1&3
Bunny Wreath
Butterfly 1,2&3
Clouds
Cupcake
Ducky
Easter Balloons
Easter Egg 1&2
Easter Sign
Eggs & Tulips
Frame 5
Rainbow
Sparkles 1,2&3
Swirls
Wreath
Add the Copyright and your License Number for the tube
Resize to your liking and save as PNG
This tutorial was created on March 23,2013 by Rhonda
Any resemblance to another Tag or Tutorial is purely coincidental
Wednesday, March 20, 2013
Jacklyn Love - Exclusive FTU

Frame used can be found at our blog HERE
Monday, March 18, 2013
Dreaming of You - FTU

Supplies Needed:
Tube of choice: Im using the wonderful art work of Keith Garvey
This tube was purchased at PTE which has closed
You can purchase his tubes at Garv - Girls PSP HERE
FTU Scrap Kit by Kittz from Kittz Kreationz "Dreaming of You" HERE
Template #222 by Millie HERE
Don't forget to leave a thank you when downloading
Xero Radiance
Tramages Mo-Jellyfish
PhotEffex Scanlines
Penta Dot & Cross
Filters Unlimited Fine Canvas
Eyecandy for wordart
Open template - Shift D to duplicate then close out original
Canvas size 700x700
Delete copyright,layers 9&10
I added borders around some of my layers for the effect
paste a paper of choice from the kit - I used paper3
selection invert delete
select none delete the original
add new layer - open paper 2 - paste into selections
select none delete the original
add new layer and flood fill with gradient of choice
apply Tramages MoJellyfish with settings of choice
apply Penta Dot & Cross with settings of choice
select none delete the original
paste a paper of choice from the kit - I used paper5
selection invert delete
select none delete the original
add noise with settings of choice
add new layer and flood fill with solid color of choice
apply filters unlimited fine canvas
add close up of tube you are using inside circle
apply Xero Radiance with settings of choice
select none delete the original
add new layer and flood fill with gradient of choice
apply PhotpEffex Scanlines
apply Eyecandy gradient with a brown color
select none delete the original
apply Eyecandy gradient with a peach color
apply Xero radiance with settings of choice
I used the following:
Element 6
Element 12
Element 13
Element 16
Element 20
Element 28
Element 36
Element 39
Element 40
Bottle Sampler
Add the Copyright and your License Number for the tube
Resize to your liking and save as PNG
This tutorial was created on March 18,2013 by Rhonda
Any resemblance to another Tag or Tutorial is purely coincidental
Friday, March 15, 2013
Monochrome Beauty - FTU

Supplies Needed:
Tube of choice: Im using the wonderful art work of Jennifer Janesko
This tube was purchased at CIM which has now closed
You can purchase her tubes now at CDO HERE
FTU Scrap Kit by Mizteeque from called "Monochrome"
You can download this awesome kit HERE
FTU cluster by Callie that matches this kit HERE
Look under Monochrome frames
Mask of choice
Xero Radiance
Xero Porcelin
PhotoEffex Scanlines
Ok Lets get Started:
Open cluster frame - shift D and close original
Canvas size 700x700
Open closeup tube and place inside the frame
Erase all the diamonds inside the frame
Apply Xero Porcelin with default settings
Apply PhotoEffex with default settings
Place main tube to right of frame
Apply Xero Radiance with settings of choice
I always place my tube then build around it
Element 1
Element 8
Element 13
Element 18
Element 20
Element 21
Element 29
Element 34
Add mask of choice
Add the Copyright and your License Number for the tube
Resize to your liking and save as PNG
This tutorial was created on March 15,2013 by Rhonda
Any resemblance to another Tag or Tutorial is purely coincidental
Thursday, March 7, 2013
Let the Sun Shine - FTU

Supplies Needed:
Tube of choice: Im using the wonderful art work of Jose Cano
I bought this tube at MPT which has now closed
You can purchase all his tubes now at HERE
FTU Cluster frame by Crystal which can be found on out blog under Breezy Day kits HERE
FTU kit by Renaee which matches this frame HERE
Mask of choice
Please leave some love when you download this mask..A little thanks goes a long way
Xero Fritillary
Open cluster frame - shift D and close original
canvas size 700x700
grab the freehand tool and go around the frame
open paper 7 from kit - paste as new layer - selections invert delete
Apply Xero Radiance with settings of choice
Duplicate tube again and move to the top
Erase any parts hanging out from bottom
I used the following:
Bird 2
Bow 4
Butterfly 1&2
Flower 3
Flower 5
Sparkle
Add paper of choice and apply mask
Add the Copyright and your License Number for the tube
Resize to your liking and save as PNG
This tutorial was created on March 4,2013 by Rhonda
Any resemblance to another Tag or Tutorial is purely coincidental
Happy Paddy Day - FTU

Supplies Needed:
Tube of choice: Im using the wonderful art work of Elias Chatzoudis
This tube was purchased at PTE which has closed
You can purchase his tubes now at his store HERE
FTU kit by Jen from Sweet Temptations called "Shamrocks" HERE
Cluster frame by Bev that matches this kit under St Patricks HERE
Mask of choice
Please leave some love when you download..A little thanks goes a long way
Xero Radiance
PhotoEffex Scanlines
Open blank canvas 700x700
Open frame & place as a new layer
Grab the magic wand & click inside the frame
Selection modify expand by 10
add new layer and flood fill with color of choice
Selections invert delete
Open the closeup of tube and place in several different areas of frames
Apply Radiance with setting of choice
Change blend mode to overlay
Apply PhotoEffext with setting of choice
Place your main tube in center of frame
Apply Xero Porcelin
I moved the wordart to the bottom of my frame
Merge your layers
Open paper of choice
Apply mask of choice
Add the Copyright and your License Number for the tube
Resize to your liking and save as PNG
This tutorial was created on Feburary 25,2013 by Rhonda
Any resemblance to another Tag or Tutorial is purely coincidental
Tuesday, March 5, 2013
Irish Dream - FTU

Supplies Needed:
Tube of choice: Im using the wonderful art work of Keith Garvey
You can purchase his tubes at Garv - Girls PSP HERE
FTU Scrap Kit by Kittz from Kittz Kreationz HERE
Don't forget to leave a thank you when downloading
Plugins Used:
Xero Radiance
Ok Lets get Started:
Open a blank 700x700 image
Open frame 25 - resize 90%
Open close up tube abd place inside frame
Erase parts of tube that is outside frame
Apply Xero Radiance with settings of choice
Place your main tube
Apply Xero Radiance again
I used the following:
Element 2
Element 8
Element 16
Element 17
Element 19
Element 20
Element 22
Element 23
Element 24
Element 28
Element 31
Add the Copyright and your License Number for the tube
Resize to your liking and save as PNG
This tutorial was created on March 5,2013 by Rhonda
Any resemblance to another Tag or Tutorial is purely coincidental
Tuesday, February 26, 2013
Luck of the Irish - FTU

Supplies Needed:
Tube of choice: Im using the wonderful art work of Tony Tzanoukakis
You can purchase his work at his store HERE
FTU Scrap Kit by Mary HERE
St Patrick Template #1 by Tika HERE
Mask of choice
Don't forget to leave a thank you when downloading
Plugins Used:
Xero Radiance
Penta Color Dot
Open template - Shift D to duplicate then close out original
Resize all layers 90%
Canvas size 715x715
Deleted copyright
paste a paper of choice from the kit - I used paper6
selection invert delete
select none delete the original
paste a paper of choice from the kit - I used paper3
selection invert delete
select none delete the original
paste a paper of choice from the kit - I used paper5
selection invert delete
select none delete the original
add a new layer and flood fill with gradient of choice
apply Penta Color Dot
select none delete the original
Xero Radiance with settings of choice
I used the following:
Cloverbeads
Flowers
Horseshoe
Rainbow
St Paddy Goodies 1&2
St Paddys Tag
Apply mask of choice
Add the Copyright and your License Number for the tube
Resize to your liking and save as PNG
This tutorial was created on Feburary 25,2013 by Rhonda
Any resemblance to another Tag or Tutorial is purely coincidental
Happy St. Paddys Day - FTU

Supplies Needed:
Tube of choice: Im using the wonderful art work of Elias Chatzoudis
This tube was purchased at PTE was has now closed
You can now purchase his work at his store HERE
FTU Scrap Kit by Melissa HERE
Template #201 by Millie HERE
Don't forget to leave a thank you when downloading
Plugins Used:
Xero Radiance
Penta Drag
PhotEffex Scanlines
Open template - Shift D to duplicate then close out original
Deleted copyright & layers 9&10
paste a paper of choice from the kit - I used paper5
selection invert delete
select none delete the original
paste a paper of choice from the kit - I used paper3
selection invert delete
select none delete the original
paste a paper of choice from the kit - I used paper7
selection invert delete
select none delete the original
paste a paper of choice from the kit - I used paper2
selection invert delete
select none delete the original
paste a paper of choice from the kit - I used paper1
selection invert delete
select none delete the original
paste a paper of choice from the kit - I used paper4
selection invert delete
select none delete the original
add new layer and flood fill with gradient
apply Penta drag with default settings
apply PhotoEffex Scanlines with default settings
select none delete the original
paste a paper of choice from the kit - I used paper8
selection invert delete
select none delete the original
add noise with settings of choice
I also added a black background
Xero Radiance with settings of choice
I used the following:
Element 1
Element 5
Element 9
Element 13
Element 20
Element 23
Element 28
Element 30
Add the Copyright and your License Number for the tube
Resize to your liking and save as PNG
This tutorial was created on Feburary 21,2013 by Rhonda
Any resemblance to another Tag or Tutorial is purely coincidental
Monday, February 18, 2013
Love You - FTU

Supplies Needed:
Tube of choice: Im using the wonderful art work of Barbara Jensen
Which you must obtain a license to use at her store HERE
FTU Cluster frame by Mary from Sweet As Honey Creationz HERE
FTU kit by mary to match the cluster HERE
Mask of choice
Please leave some love when you download ...A little thanks goes a long way
Xero Radiance
Open cluster frame - shift D and close original
Resize cluster 92% all layers
canvas size 700x700
grab the freehand tool and go around the frame
open paper 6 from kit - paste as new layer under frame
selections invert delete
Apply Xero Radiance with settings of choice
I used the following:
Decor 1
Heart Butterfly 1
Valentine 1
Sparkles 3 - I duplicated several times
Open paper 1 from kit and place as a new layer
Open mask and apply to tag
Add the Copyright and your License Number for the tube
Resize to your liking and save as PNG
This tutorial was created on Feburary 17,2013 by Rhonda
Any resemblance to another Tag or Tutorial is purely coincidental
Tuesday, February 12, 2013
Spin Around My Finger - FTU

Supplies Needed:
Tube of choice: Im using the wonderful art work of Zlata_M
Which you must obtain a license to use at Pics for Design HERE
FTU Scrap Kit by Kristen which you can download HERE
Template #184 by Millie HERE
Mask by Vesta HERE
Don't forget to leave a thank you when downloading
Plugins Used:
Xero Radiance
Open template - Shift D to duplicate then close out original
delete copyright
paste a paper of choice from the kit - I used paper7
selection invert delete
select none delete the original
paste a paper of choice from the kit - I used paper10
selection invert delete
select none delete the original
paste a paper of choice from the kit - I used paper3
selection invert delete
select none delete the original
paste a paper of choice from the kit - I used paper1
selection invert delete
select none delete the original
add new layer and flood fill with black
select none delete the original
paste a paper of choice from the kit - I used paper11
selection invert delete
select none delete the original
On layers 10 & 12 add noise with settings of choice
add new layer and flood fill with gradient of choice
select none delete the original
Add closeup of tube in the right circle
Apply Xero Radiance
Change blend mode to screen
Xero Radiance with settings of choice
Bomb
Bottle
Butterfly
Candy
Cupcake
Filmstrip
Kitty
Skull 1
Sparkles
Speakers
Splatter
Add mask
Add the Copyright and your License Number for the tube
Resize to your liking and save as PNG
This tutorial was created on Feburary 12,2013 by Rhonda
Any resemblance to another Tag or Tutorial is purely coincidental
Thursday, February 7, 2013
A Dirty Mind - FTU

Supplies Needed:
Tube of choice: Im using the wonderful art work of Keith Garvey
You can purchase his tubes at Garv - Girls PSP HERE
FTU Scrap Kit by Tasha from Tasha's Playground called "Wild Thing" HERE
Template #169 from Amy & Leah HERE
Don't forget to leave a thank you when downloading
Plugins Used:
Xero Radiance
Tramages Pool Shadow
PhotEffex Scanlines
Eyecandy for wordart
Open template - Shift D to duplicate then close out original
Resize all layers 116%
Canvas size 700x700
Delete copyright
paste a paper of choice from the kit - I used paper5
selection invert delete
select none delete the original
paste a paper of choice from the kit - I used paper3
selection invert delete
select none delete the original
Apply Tramages Pool Shadow with default settings
Add close up of tube you are using inside heart
selection invert delete
select none delete the original
Apply Xero Radiance with settings of choice
Apply PhotoEffex with default settings
paste a paper of choice from the kit - I used paper2
selection invert delete
select none delete the original
paste a paper of choice from the kit - I used paper1
selection invert delete
select none delete the original
paste a paper of choice from the kit - I used paper6
selection invert delete
select none delete the original
paste a paper of choice from the kit - I used paper7
selection invert delete
select none delete the original
apply Xero radiance with settings of choice
I used the following:
Brad
Confetti
Heart
Pillow
Splatter
Wordart
Add the Copyright and your License Number for the tube
Resize to your liking and save as PNG
This tutorial was created on Feburary 7,2013 by Rhonda
Any resemblance to another Tag or Tutorial is purely coincidental
Saturday, February 2, 2013
Rebel - Exclusive at the CC

Tuesday, January 29, 2013
Love - FTU

Supplies Needed:
Tube of choice: Im using the wonderful art work of Eugene Rzhevskii
You can purchase this tube at Pics for Design HERE
FTU Scrap Kit by Melissa HERE
Mask of choice
Don't forget to leave a thank you when downloading
Plugins Used:
Xero Radiance
Open template - Shift D to duplicate then close out original
Canvas size 700x700
Delete the copyright,hearts & dotted circle
I used a pink color on the word then used a blind effect
I then used a red color for the background
Merge the 2 together and dropshadow
paste a paper of choice from the kit - I used paper11
selection invert delete
select none delete the original
paste a paper of choice from the kit - I used paper6
selection invert delete
select none delete the original
paste a paper of choice from the kit - I used paper2
selection invert delete
select none delete the original
paste a paper of choice from the kit - I used paper3
selection invert delete
select none delete the original
Apply Xero Radiance with default settings
Add blinds effect
paste a paper of choice from the kit - I used paper4
selection invert delete
select none delete the original
Add noise 45% uniform
Xero radiance with settings of choice
Open raster 29 - resize 90% - position to the right beside wordart (I mirrored mine)
Open raster 21 - position on bottom left of tag behind wordart
Open raster 20 - position on bottom left of tag beside other cupcake
Open raster 16 - position in center of tag at the top
Open raster 5 - position to right of tag behind tube and pink hearts
Add mask
Add the Copyright and your License Number for the tube
Resize to your liking and save as PNG
This tutorial was created on January 22,2013 by Rhonda
Any resemblance to another Tag or Tutorial is purely coincidental
Subscribe to:
Posts (Atom)
My Blinkie

My Licenses

