Tuesday, December 25, 2012
Emotude - PTU

Supplies Needed:
PTU Scrap Kit By Aurelie from Pink Candy Designs called "Emotude"
You an find this awesome kit HERE
Open a blank image 700x700
grab the magik wand and click inside frame
Select modify expand by 6
Open paper 3 from kit and place as a new layer
selections invert - delete
move paper under frame
I used the following:
Bear
Bottle
Butterfly 2
Candle
Candy
Cupcake 2
Dangler
Gumball
Heart
Lollipop
Skullgum
Sparkles
Spider
Splatter 2
Add the Copyright and your License Number for the tube
Resize to your liking and save as PNG
This tutorial was created on December 25,2012 by Rhonda
Any resemblance to another Tag or Tutorial is purely coincidental

Sunday, December 23, 2012
Santas Gift Babe - PTU

Tube of choice: Im using the wonderful art work of Ismael Rac
You can purchase his tubes HERE
PTU Scrap Kit by Jen from Sweets Temptations called "Christmas Ribbon"
You can purchase this kit on her blog HERE
Template #19 by Wendy HERE
Mask 56 from Rosesblack HERE
Don't forget to leave a thank you when downloading
Plugins Used:
Xero Radiance
Xero Fritillary
Open template - Shift D to duplicate then close out original
Canvas size 700x7000
I deleted copyright & dotted lines
paste a paper of choice from the kit - I used paper6
selection invert delete
select none delete the original
paste a paper of choice from the kit - I used paper5
selection invert delete
select none delete the original
add new layer and flood fill with color of choice
add Xero Fritillary with settings of choice
select none delete the original
Apply Xero radiance with settings of choice
Bells
Box
Candycane
Cat Ornament
Cup
House
Ornament 1&2
Reindeer
Stocking
Apply mask
Add the Copyright and your License Number for the tube
Resize to your liking and save as PNG
This tutorial was created on December 23,2012 by Rhonda
Monday, December 17, 2012
Letter to the North Pole - FTU

Supplies Needed:
Tube of choice: Im using the wonderful art work of Elias Chatzoudis
Which you must obtain a license to use at his store HERE
This tube was purchased at MPT which has closed
FTU Scrap Kit by Vaybs called "To The North Pole"
You an download this awesome kit HERE
Chrsitmas Mask #11 by Vaybs HERE
Plugins Used:
Xero Radiance
Open a white blank canvas 700x700
Open element 25 from kit and place as a new layer
Grab the magik wand and click inside frame
Selections Modify expand by 10
Open paper 10 from kit and place as a new layer
Selections - invert - delete
Move layer under frame
Open element 35 - place to right of frame
Open tube and place to left of frame
Open element 41 and resize 42% - place behind tube with address showing
Open element 23 resize 45% - move beside the letter
Open element 6 and place to far right of tree
Open element 22 and resize 42% - place beside other present
Open element 40 resize 42% and place in front of tube
Open paper 6 from kit and place under tag
Open mask and apply
Add the Copyright and your License Number for the tube
Resize to your liking and save as PNG
This tutorial was created on December 9,2012 by Rhonda
Any resemblance to another Tag or Tutorial is purely coincidental
Christmas Dazzle - PTU

Supplies Needed:
Tube of choice: Im using the wonderful art work of Very Many
You must obtain a license to use her art at Pics for Design HERE
PTU Scrap Kit by Nicky from Inzpired Creationz called "Dazzle Me"
You an purchase this awesome kit at SATC HERE
FTU cluster frame by Christene from PSPers Delite HERE
Mask of choice
Plugins Used:
Xero Radiance
Open blank 700x700
Open frame and paste as new layer
grab the magic wand & click inside the biggest frame
Selections modify expand by 3
Paste a paper of choice and paste as a new layer
Selections invert delete
Move paper under frame
Place main tube in biggest frame and erase the parts showing
Apply closeup of tube in the smallest tube
Apply Xero Radiance to both tubes
Add elements you want to frame
I used:
Candy Cane 1
Frame Border 1 - duplicate
Click inside the borders and add a paper of choice
Poinsetta
Scattered Snowflake 1
Apply mask of choice
Add the Copyright and your License Number for the tube
Resize to your liking and save as PNG
This tutorial was created on December 16,2012 by Rhonda
Any resemblance to another Tag or Tutorial is purely coincidental
Friday, December 14, 2012
I Want To Rock You - PTU

Supplies Needed:
Tube of choice: Im using the wonderful art work of Alex Prihodko
You can purchase this tube at Pics for Design HERE
PTU Scrap Kit by Nicky from Inzpired Creationz called "Merry Pinksexmas"
You an purchase this awesome kit at SATC HERE
Template #439 by Missy from Divine Intentionz HERE
Don't forget to leave a thank you when downloading
Plugins Used:
Xero Radiance
Open template - Shift D to duplicate then close out original
Canvas size 700x7000
I deleted copyright,copy of dotted circle and all tree parts
paste a paper of choice from the kit - I used paper3
selection invert delete
select none delete the original
paste a paper of choice from the kit - I used paper5
selection invert delete
select none delete the original
add new layer and fill with color of choice from kit
select none delete the original
paste a paper of choice from the kit - I used paper10
selection invert delete
select none delete the original
Apply Xero Radiance with settings of choice
I used the following:
Bow 3
Cake Pop 1&2
Christmas Tree 2
All condoms
Cupcake 3
Both Gifts
Lolli 1&3
Snow
Stocking 2
Add the Copyright and your License Number for the tube
Resize to your liking and save as PNG
This tutorial was created on December 14,2012 by Rhonda
Any resemblance to another Tag or Tutorial is purely coincidental
All Dreams - FTU

Supplies Needed:
Tube of choice: Im using the wonderful art work Ismael Rac
You can purchase this tube at his store HERE
FTU kit by Mizteeque HERE
Template #6 by Tracy HERE
Look to the right and you will see the holiday temp downloads
Wordart by Mizteeque HERE
Don't forget to leave a thank you when downloading
Plugins Used:
Xero Radiance
Filters Unlimited Textures
Open template - Shift D to duplicate then close out original
Canvas size 700x660
Delete copyright layer and wordart
paste a paper of choice from the kit - I used paper4
selection invert delete
select none delete the original
paste a paper of choice from the kit - I used paper8
selection invert delete
select none delete the original
apply texture of choice
paste a paper of choice from the kit - I used paper10
selection invert delete
select none delete the original
Add closeup of tube to the shape
apply Xero Radiance with settings of choice
Add Xero Radiance again
I used the following:
Any 3 christmas balls of choice
Element 28
Element 33
Element 41
Element 51
Merge the layers
Place your name where you like it
Add the Copyright and your License Number for the tube
Resize to your liking and save as PNG
This tutorial was created on December 14, 2012 by Rhonda
Any resemblance to another Tag or Tutorial is purely coincidental
Monday, December 10, 2012
Santa's Naughty Little Helper - FTU

Supplies Needed:
Tube of choice: Im using the wonderful art work of Zlata_M
This tube was a prepaid which was gifted to me by a wonderful friend
You can purchase her tubes HERE
Limited FTU Scrap Kit by Jen from Sweets Temptations called "12 Days of Christmas 2012"
This kit will be available on her blog 12/14 HERE
Don't forget to leave a thank you when downloading
Plugins Used:
Xero Radiance
Open template - Shift D to duplicate then close out original
Resize all layers 86%
Canvas size 700x7000
I deleted copyright & new layer
paste a paper of choice from the kit - I used paper6
selection invert delete
select none delete the original
I added a border of 3 with glitter 4 & noise
paste a paper of choice from the kit - I used paper33
selection invert delete
select none delete the original
I added a border of 3 with glitter 6 & noise
paste a paper of choice from the kit - I used glitter 6
selection invert delete
select none delete the original
add noise with settings of choice
paste a paper of choice from the kit - I used paper31
selection invert delete
select none delete the original
paste a paper of choice from the kit - I used paper1
selection invert delete
select none delete the original
Apply Xero Radiance with settings of choice
add a new layer and flood fill with gradient of choice
add noise with settings of choice
select none delete the original
add a new layer & flood fill with white
select none delete the original
Apply Xero radiance with settings of choice
I used the following:
Bow 1
Candy Ornament 1&5
Lights
Lollipop 2
Note
Ornament 5&6
Tinsel
Wreath
Add the Copyright and your License Number for the tube
Resize to your liking and save as PNG
This tutorial was created on December 10,2012 by Rhonda
Any resemblance to another Tag or Tutorial is purely coincidental
Sunday, December 9, 2012
Spearmint Christmas - FTU

Supplies Needed:
Tube of choice: Im using the wonderful art work of Suzanne Woolcott
Not sure if you can still purchase her tubes but her store is HERE
FTU Scrap Kit by MizTeeque called "Spearmint Christmas" HERE
Mask of choice
Don't forget to leave a thank you when downloading
Plugins Used:
Xero Radiance
Open element 28 - paste as a new layer
Resize 88% - rotate 90 degrees to the right
Grab the selection tool and draw a rectangle around the frame
Open paper 12 - Selections invert delete
Move paper under frame
Open element 5 - resize - place to right of frame
Open element 36 - resize small enough to place on tree - place as many as desired
Open element 23 - resize and place to top left of frame
Open element 43 - resize - place to bottom left of frame
Open element 41 - place beside heart
Open element 21 - resize and place to top left of frame
Open element 15 - resize - place to bottom left of frame on top of bells
Open element 29 - resize - place behind frame - duplicate
Move duplicate bow to the top - Using the eraser tool erase the parts you don't want showing
Place your main tube to right of frame
Apply Xero radiance with settings of choice
Merge your layers
Open paper and apply mask of choice
Add the Copyright and your License Number for the tube
Resize to your liking and save as PNG
This tutorial was created on December 1,2012 by Rhonda
Any resemblance to another Tag or Tutorial is purely coincidental
Friday, December 7, 2012
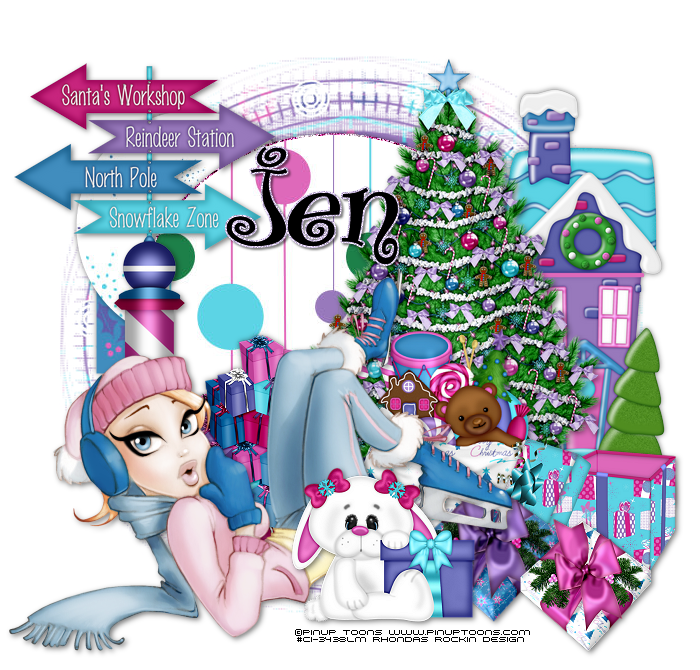
This Way to Christmas - FTU
Supplies Needed:
Tube of choice: Im using the wonderful art work of Pinup Toons
Which you must obtain a license to use at CDO HERE
This tube was bought at CILM which has closed
Limited FTU Scrap Kit by Jen from Sweet Temptations called "12 Days of Christmas 2012"
You an download this awesome kit HERE starting 12/14
Template #9 from Carrie's Concoctions HERE
Don't forget to leave a thank you when downloading
Plugins Used:
Xero Radiance
Open template - Shift D to duplicate then close out original
Resize 84% all layers checked
Canvas size 700x675
delete copyright & layer SC1
paste a paper of choice from the kit - I used paper12
selection invert delete
select none delete the original
paste a paper of choice from the kit - I used paper14
selection invert delete
select none delete the original
paste a paper of choice from the kit - I used paper32
selection invert delete
select none delete the original
I also added a border around the circle
paste a paper of choice from the kit - I used paper14
selection invert delete
select none delete the original
Place your main tube
Xero Radiance with settings of choice
I used the following:
Bunny N Gift
Gift Stack
Gifts 3,4 & 6
House 1
Sign
Toy Bag
Tree
Add mask of choice
Add the Copyright and your License Number for the tube
Resize to your liking and save as PNG
This tutorial was created on December 7, 2012 by Rhonda
Any resemblance to another Tag or Tutorial is purely coincidental
Gifts - PTU

Supplies Needed:
Tube of choice: Im using the wonderful art work of Eugene Rzhevskii
Which you must obtain a license to use at Pics for Design HERE
PTU Scrap Kit by Aurelie from Pink Candy Design called "Pretty Elf"
You an purchase this awesome kit HERE
Template #165 by Punky Butts HERE
Don't forget to leave a thank you when downloading
Plugins Used:
Xero Radiance
Xero Fritillary
Open template - Shift D to duplicate then close out original
resize layers 86%
Canvas size 700x700
delete copyright & all stars
paste a paper of choice from the kit - I used paper 7
selection invert delete
select none delete the original
paste a paper of choice from the kit - I used paper 13
selection invert delete
select none delete the original
paste a paper of choice from the kit - I used paper 10&15
selection invert delete
select none delete the original
paste a paper of choice from the kit - I used papers 3&5
selection invert delete
select none delete the original
Add noise at 75% with uniform and monochrome checked
paste a paper of choice from the kit - I used paper 2
selection invert delete
select none delete the original
paste a paper of choice from the kit - I used paper 4
selection invert delete
select none delete the original
apply Xero fritillary with settings of choice
paste a paper of choice from the kit - I used paper 2
selection invert delete
select none delete the original
Add noise at 75% with uniform and monochrome checked
apply closeup of tube you are using
apply Xero Radiance with settings of choice
Xero Radiance with settings of choice
I used the following:
Bauble 2
Bells
Candy
Cat 2
Cupcake
Kitty
Mug
Santainbag
Sign
Snowbuddy
Tree
Add the Copyright and your License Number for the tube
Resize to your liking and save as PNG
This tutorial was created on December 7, 2012 by Rhonda
Any resemblance to another Tag or Tutorial is purely coincidental
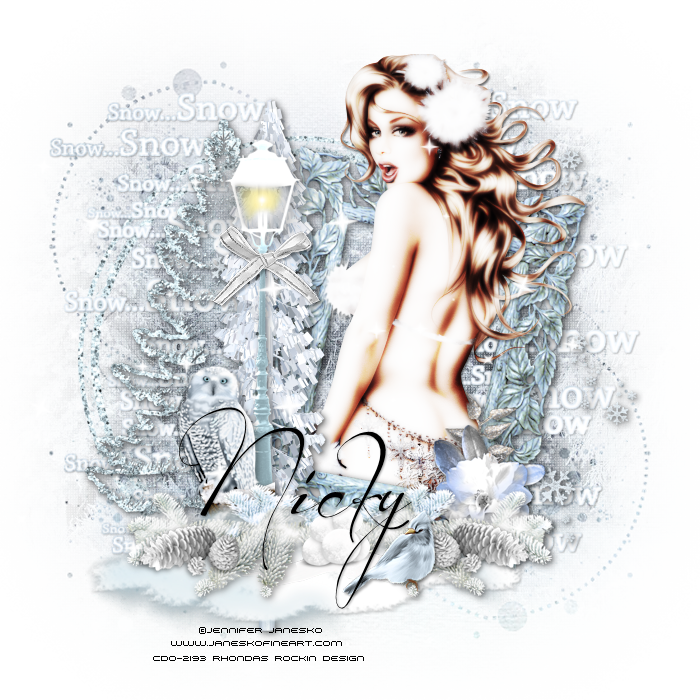
Snow Beauty - PTU
Supplies Needed:
Tube of choice: Im using the wonderful art work of Jennifer Janesko
You must obtain a license to use her art at CDO HERE
PTU Scrap Kit by Nicky from Inzpired Creationz called "Icy Blue"
You an purchase this awesome kit at SATC HERE
FTU cluster frame by Christene from PSPers Delite HERE
Mask of choice
Plugins Used:
Xero Radiance
Open blank 700x700
Open frame and paste as new layer
Place tube in frame and erase the parts showing
Apply Xero Radiance
Add elements you want to frame
I used:
Bird
Bow 2
Frame Border 2
Sparkles 2
WA 1
Apply mask of choice
Add the Copyright and your License Number for the tube
Resize to your liking and save as PNG
This tutorial was created on December 6,2012 by Rhonda
Any resemblance to another Tag or Tutorial is purely coincidental
Thursday, December 6, 2012
Wild Christmas - FTU

Supplies Needed:
Tube of choice: Im using the wonderful art work of Keith Garvey
You can purchase his work at his store HERE
FTU Scrap Kit by Eileens Design called "Wild Christmas" HERE
Exclusive Template by Tammy at the CC Forum - can't supply
Mask of choice HERE
Don't forget to leave a thank you when downloading
Xero Radiance
Eyecandy Gradient
Open template - Shift D to duplicate then close out original
Resize 90% all layers
Canvas size 700x700
Delete copyright
paste a paper of choice from the kit
selection invert delete
select none delete the original
paste a paper of choice from the kit
selection invert delete
select none delete the original
paste a paper of choice from the kit
selection invert delete
select none delete the original
paste a paper of choice from the kit
selection invert delete
select none delete the original
I added a border with noise
paste a paper of choice from the kit
selection invert delete
select none delete the original
paste a paper of choice from the kit - I used different papers in each circle
selection invert delete
select none delete the original
add a new layer and flood fill with white
add texture of choice
select none delete the original
paste a paper of choice from the kit
selection invert delete
select none delete the original
paste a paper of choice from the kit
selection invert delete
select none delete the original
apply Xero Radiance with settings of choice
Lower opacity tp 62
paste a paper of choice from the kit
selection invert delete
select none delete the original
Add noise with settings of choice
Add Eyecandy gradient
Xero radiance with settings of choice
I used the following:
Elements 1,2,3,10,18,24,35,39,40
Add mask of choice
Add the Copyright and your License Number for the tube
Resize to your liking and save as PNG
This tutorial was created on December 6,2012 by Rhonda
Any resemblance to another Tag or Tutorial is purely coincidental
Monday, December 3, 2012
All My Winter Friends - PTU

Supplies Needed:
Tube of choice: Im using the wonderful art work of Sonia Roji
Which you must obtain a license to use at CDO HERE
PTU Scrap Kit By Aurelie from Pink Candy Designs called "Christmas Time"
You an find this awesome kit HERE
Mask of choice
Please leave some love when you download this mask..A little thanks goes a long way
Plugins Used:
Xero Porcelin
Open a blank image 700x700
grab the magik wand and click inside frame
Select modify expand by 6
Open paper 12 from kit and place as a new layer
selections invert - delete
move paper under frame
Place your main tube
Apply Xero Porcelin with settings of choice
I used the following:
Bunny
Cat
Kitty
Penguin
Rudolph
Scarf
Sign
Tree
Apply mask
Add the Copyright and your License Number for the tube
Resize to your liking and save as PNG
This tutorial was created on December 2,2012 by Rhonda
Any resemblance to another Tag or Tutorial is purely coincidental
Christmas Joy - FTU

Supplies Needed:
Tube of choice: Im using the wonderful art work of Keith Garvey
This tube was purchased at PTE which has now closed
You can now find Garvey's work at his own store HERE
FTU Scrap Kit By Teresa from Topcats Tagz called "Christmas Joy"
You an find this awesome kit HERE
Please remember to say Thank You when downloading
Mask of choice
Plugins Used:
Xero Radiance
Open a blank image 700x700
Resize elements to your liking
Dropshadow of choice
Grab the magik wand & click inside wreath
Selection modify expand by 10
Open paper 2 & paste as a new layer - select none
Move paper under wreath
Effects Texture Blinds with settings of choice
Open element 24 and place inside wreath
Open element 1 and place to right of tag
You don't want the wreath to show behind the tree
Open elements 15&16 and place in front of tree
Open element 18 and place in front of presents
Open element 30 and place to left of tag
Place your main tube infron of wreath
Apply Xero Radiance with settings of choice
Open element 23 and place in front of tube
Merge your layers
Open mask and apply to tag
Add the Copyright and your License Number for the tube
Resize to your liking and save as PNG
This tutorial was created on November 23,2012 by Rhonda
Any resemblance to another Tag or Tutorial is purely coincidental
Just a Little Present - FTU

Supplies Needed:
Tube of choice: Im using the wonderful art work of Zlata_M
This tube was a gift I got from PFD
You can purchase her work HERE
FTU Scrap Kit by Jen from Sweets Temptations called "Crazy Christmas"
You an download this awesome kit HERE
Template #24 by Rosa HERE
Christmas mask 1 from Essex Girl HERE
Don't forget to leave a thank you when downloading
Plugins Used:
Xero Radiance
Open template - Shift D to duplicate then close out original
I deleted copyright,wordart,layers 6,7,8&9
paste a paper of choice from the kit - I used paper2
selection invert delete
select none delete the original
fill with a solid color of choice
selection invert delete
select none delete the original
add close-up of tube you are using
selection invert delete
select none delete the original
paste a paper of choice from the kit - I used paper1
selection invert delete
select none delete the original
apply Xero radiance with settings of choice
I used the following:
Bag 2
Bear 1
Candy 1
CandyCane 1
Gift
Hat Kitty
Ornaments 3&4
Sign
Tree
Open paper 5 and paste as new ;ayer
Open mask in psp and apply to tag
Add the Copyright and your License Number for the tube
Resize to your liking and save as PNG
This tutorial was created on December 3,2012 by Rhonda
Any resemblance to another Tag or Tutorial is purely coincidental
Saturday, December 1, 2012
Candy Cane Girl - FTU Exclusive

Tutorial using items from Novembers Monthly Challanges over at the CC forum
Tutorial exclusive to the forum only
Why not join us by clicking the button on the right
We would love to have you!!!!!!!!!!!!!
Pink & Black Fetish - PTU

Supplies Needed:
Tube of choice: Im using the wonderful art work of Nasionnaine
You can purchase her work at SATC HERE
PTU Scrap Kit by Nicky from Inzpired Creationz called "Fetish"
You an purchase this awesome kit at SATC HERE
Mask of choice
Plugins Used:
Xero Radiance
Open a blank canvas 700x700
Very easy tutorial because the frame used is totally loaded!!!!
Open frame 3 from kit - place as a new layer
Take the selection tool and draw around frame
Drop down a layer and paste paper of choice in frame
Place your main tube
Add Xero Radiance with settings of choice
Erase all of tube outside frame
I used the following:
Bottle 1
Hat 1
Whip
Add mask of choice
Add the Copyright and your License Number for the tube
Resize to your liking and save as PNG
This tutorial was created on December 1,2012 by Rhonda
Any resemblance to another Tag or Tutorial is purely coincidental
Spreading Garv Cheer - PTU

Supplies Needed:
Tube of choice: Im using the wonderful art work of Keith Garvey
You can purchase his work at his store HERE
PTU Scrap Kit by Jen from Sweets Temptations called "Spreading Christmas Cheer"
You an purchase this awesome kit HERE
Template #184 by Tami HERE
Don't forget to leave a thank you when downloading
Xero Radiance
Photo Effex Scanlines
Open template - Shift D to duplicate then close out original
Resize 88% all layers
Canvas size 700x700
paste a paper of choice from the kit - I used paper3
selection invert delete
select none delete the original
paste a paper of choice from the kit - I used paper9
selection invert delete
select none delete the original
I added notebook element
selection invert delete
select none delete the original
paste a paper of choice from the kit - I used paper6
selection invert delete
select none delete the original
paste a paper of choice from the kit - I used paper4
selection invert delete
select none delete the original
paste a paper of choice from the kit - I used paper1
selection invert delete
select none delete the original
add close-up of tube you are using
selection invert delete
select none delete the original
apply Xero Radiance with settings of choice
Xero radiance with settings of choice
I used the following:
Bag 2
Bow 1
Bulb Box
Card
Gifts
Ornaments
Pup
Santa
Add the Copyright and your License Number for the tube
Resize to your liking and save as PNG
This tutorial was created on December 1,2012 by Rhonda
Any resemblance to another Tag or Tutorial is purely coincidental
BahHumbug - PTU

Supplies Needed:
Tube of choice: Im using the wonderful art work of Barbara Jensen
You can purchase her work at her own store HERE
PTU Scrap Kit by Nicky from Inzpired Creationz called "BahHumbug"
You an purchase this awesome kit from SATC HERE
Template 131 by Amy & Leah HERE
Don't forget to leave a thank you when downloading
Plugins Used:
Xero Radiance
Xero Fritillary
Open template - Shift D to duplicate then close out original
Resize template 126% all layers
Canvas size 715x700
Delete copyright,all wordart, layers 2,3,4 & 7
paste a paper of choice from the kit - I used paper7
selection invert delete
select none delete the original
paste a paper of choice from the kit - I used paper9
selection invert delete
select none delete the original
paste a paper of choice from the kit - I used paper10
selection invert delete
select none delete the original
paste a paper of choice from the kit - I used paper6
selection invert delete
select none delete the original
Add Xero Fritillary with settings of choice
paste a paper of choice from the kit - I used paper8
selection invert delete
select none delete the original
Xero Radiance with settings of choice
I used the following:
Cat
Cocktail
Cupcake 2
Flower 2
Frame 2
Lolli 3
Ornament 1&2
Snowflake Border
Stocking
Wordart 2
Xmas Tree
Add the Copyright and your License Number for the tube
Resize to your liking and save as PNG
This tutorial was created on December 1,2012 by Rhonda
Any resemblance to another Tag or Tutorial is purely coincidental
Subscribe to:
Posts (Atom)
My Blinkie

My Licenses

