Tuesday, July 17, 2012
PTU - Hot Stuff

This tutorial is written for those with knowledge of PSP
Supplies Needed:
Tube of choice: Im using the wonderful art work of Lorenzo DiMauro
You must obtain a license to use his awesome creations at PTE HERE
Scrap Kit By Aurelie from Pink Candy Designs called "Skullz Goth"
You an purchase this awesome kit HERE
Template #130 from Rose's Place
You can get this HERE
Texture found HERE
Mask #19 from Moonbeams and Spiderwebs
You can get this HERE
Don't forget to leave a thank you when downloading
Supplies Needed:
Tube of choice: Im using the wonderful art work of Lorenzo DiMauro
You must obtain a license to use his awesome creations at PTE HERE
Scrap Kit By Aurelie from Pink Candy Designs called "Skullz Goth"
You an purchase this awesome kit HERE
Template #130 from Rose's Place
You can get this HERE
Texture found HERE
Mask #19 from Moonbeams and Spiderwebs
You can get this HERE
Don't forget to leave a thank you when downloading
Plugins Used:
Xero Radiance
Xero Fritillary
Ok Lets get Started:
Open template - Shift D to duplicate then close out original
Canvas 700x662
Delete copyright layer,raster 8,copy of raster 8 & raster 3
Open template - Shift D to duplicate then close out original
Canvas 700x662
Delete copyright layer,raster 8,copy of raster 8 & raster 3
Click on raster 7 selections,select all, float,defloat
paste a paper of choice from the kit - I used paper 6
selection invert delete
select none delete the original
paste a paper of choice from the kit - I used paper 6
selection invert delete
select none delete the original
Click on raster 5 selections,select all, float,defloat
paste a paper of choice from the kit - I used paper 10
selection invert delete
select none delete the original
paste a paper of choice from the kit - I used paper 10
selection invert delete
select none delete the original
Click on raster 6 selections,select all, float,defloat
paste a paper of choice from the kit - I used paper 2
selection invert delete
select none delete the original
paste a paper of choice from the kit - I used paper 2
selection invert delete
select none delete the original
Repeat above for copy of raster 6
Click on copy 2 of raster 3 selections,select all, float,defloat
paste a paper of choice from the kit - I used paper 13
selection invert delete
select none delete the original
paste a paper of choice from the kit - I used paper 13
selection invert delete
select none delete the original
Repeat above instructions for copy 3 of raster 3
Click on raster 4 selections,select all, float,defloat
paste a paper of choice from the kit - I used paper 1
selection invert delete
select none delete the original
paste a paper of choice from the kit - I used paper 1
selection invert delete
select none delete the original
Repeat above for copy of raster 4
Click on raster 1 selections,select all, float,defloat
paste your texture and colorize to match your tube
selection invert delete
Add Xero Fritillary with settings of choice
select none delete the original
paste your texture and colorize to match your tube
selection invert delete
Add Xero Fritillary with settings of choice
select none delete the original
Add noise to raster 2 with settings of choice
Click on raster 9 selections,select all, float,defloat
pick 2 colors and make a gradient
add new layer and flood fill the wordart
add effects texture with settings of choice
select none delete the original
pick 2 colors and make a gradient
add new layer and flood fill the wordart
add effects texture with settings of choice
select none delete the original
Merge the wordart and place where you choose
Place your main tube
Add Xero Radiance with settings of choice
Now time to add our elements
I used the following:
Beads
Beads2
Bow
Candy
Candle
Cupcake 3
Glitter
Kitten
Martini
Sparkles
Star
Wire
I used the following:
Beads
Beads2
Bow
Candy
Candle
Cupcake 3
Glitter
Kitten
Martini
Sparkles
Star
Wire
Paste paper 14 as a new layer and add mask
Merge your layers
Place your name where you like it
Add the Copyright and your License Number for the tube
Resize to your liking and save as PNG
This tutorial was created on July 17, 2012 by Rhonda
Any resemblance to another Tag or Tutorial is purely coincidental
Add the Copyright and your License Number for the tube
Resize to your liking and save as PNG
This tutorial was created on July 17, 2012 by Rhonda
Any resemblance to another Tag or Tutorial is purely coincidental


Friday, July 13, 2012
PTU - Old School

This tutorial is written for those with knowledge of PSP
Supplies Needed:
Tube of choice: Im using the wonderful art work of Keith Garvey
I bought this tube at MPT which is now closed
You can find Garvey's tube at PTE HERE
Scrap Kit By Aurelie from Pink Candy Designs called "Tracey"
You an purchase this awesome kit HERE
Template #136 from Amy & Leah
You can get this HERE
Don't forget to leave a thank you when downloading
Supplies Needed:
Tube of choice: Im using the wonderful art work of Keith Garvey
I bought this tube at MPT which is now closed
You can find Garvey's tube at PTE HERE
Scrap Kit By Aurelie from Pink Candy Designs called "Tracey"
You an purchase this awesome kit HERE
Template #136 from Amy & Leah
You can get this HERE
Don't forget to leave a thank you when downloading
Plugins Used:
Xero Radiance
Ok Lets get Started:
Open template - Shift D to duplicate then close out original
Resize template 120% with all layers checked
Canvas 700x620
Delete copyright layer
Open template - Shift D to duplicate then close out original
Resize template 120% with all layers checked
Canvas 700x620
Delete copyright layer
Click on raster 9 selections,select all, float,defloat
paste a paper of choice from the kit - I used paper7
selection invert delete
select none delete the original
paste a paper of choice from the kit - I used paper7
selection invert delete
select none delete the original
Click on raster 7&8 selections,select all, float,defloat
paste a paper of choice from the kit - I used paper4
selection invert delete
select none delete the original
paste a paper of choice from the kit - I used paper4
selection invert delete
select none delete the original
Click on raster 6 selections,select all, float,defloat
paste a paper of choice from the kit - I used paper 5
selection invert delete
select none delete the original
paste a paper of choice from the kit - I used paper 5
selection invert delete
select none delete the original
Click on raster 5 selections,select all, float,defloat
paste a paper of choice from the kit - I used paper3
selection invert delete
select none delete the original
paste a paper of choice from the kit - I used paper3
selection invert delete
select none delete the original
Add noise to raster 4&1 with settings of choice
Click on raster 3 selections,select all, float,defloat
paste a paper of choice from the kit - I used paper10
selection invert delete
select none delete the original
paste a paper of choice from the kit - I used paper10
selection invert delete
select none delete the original
Click on raster 2 selections,select all, float,defloat
paste a paper of choice from the kit - I used paper1
selection invert delete
select none delete the original
paste a paper of choice from the kit - I used paper1
selection invert delete
select none delete the original
Add parts of the tube you are using into raster 2
Apply Xero Radiance with settings of choice
Apply Xero Radiance with settings of choice
Place your main tube
Add Xero Radiance again
Add Xero Radiance again
Now time to add our elements
I used the following:
Bag
Bear
Bottle
Broken Heart
Candy
Cupcake
Fuzzy Heart
Glitter
Netting
Sparkles
Star 2
Stars
Wire
I used the following:
Bag
Bear
Bottle
Broken Heart
Candy
Cupcake
Fuzzy Heart
Glitter
Netting
Sparkles
Star 2
Stars
Wire
Merge your layers
Place your name where you like it
Add the Copyright and your License Number for the tube
Resize to your liking and save as PNG
This tutorial was created on July 13, 2012 by Rhonda
Any resemblance to another Tag or Tutorial is purely coincidental
Add the Copyright and your License Number for the tube
Resize to your liking and save as PNG
This tutorial was created on July 13, 2012 by Rhonda
Any resemblance to another Tag or Tutorial is purely coincidental
Sunday, July 8, 2012
PTU - Totally Emo
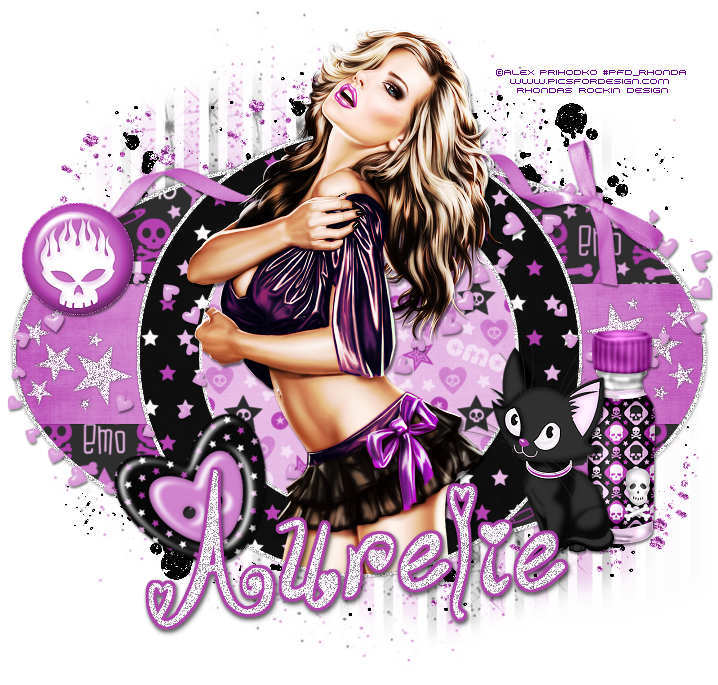
This tutorial is written for those with knowledge of PSP
Supplies Needed:
Tube of choice: Im using the wonderful art work of Alex Prihodko
Which you must obtain a license to use at Pics for Design HERE
Scrap Kit By Aurelie from Pink Candy Designs called "Totally Emo"
You an purchase this awesome kit HERE
Template #84 by Rose from Rose's Place
You can get this HERE
Mask #66 from Rosesblack
You can get this HERE
Don't forget to leave a thank you when downloading
Supplies Needed:
Tube of choice: Im using the wonderful art work of Alex Prihodko
Which you must obtain a license to use at Pics for Design HERE
Scrap Kit By Aurelie from Pink Candy Designs called "Totally Emo"
You an purchase this awesome kit HERE
Template #84 by Rose from Rose's Place
You can get this HERE
Mask #66 from Rosesblack
You can get this HERE
Don't forget to leave a thank you when downloading
Plugins Used:
Xero Radiance
Ok Lets get Started:
Open template - Shift D to duplicate then close out original
Canvas 718x685
I deleted copyright,wordart & raster 2
Open template - Shift D to duplicate then close out original
Canvas 718x685
I deleted copyright,wordart & raster 2
Click on raster 8 selections,select all, float,defloat
paste a paper of choice from the kit - I used paper11
selection invert delete
select none delete the original
paste a paper of choice from the kit - I used paper11
selection invert delete
select none delete the original
Click on raster 10 selections,select all, float,defloat
paste a paper of choice from the kit - I used paper8
selection invert delete
select none delete the original
paste a paper of choice from the kit - I used paper8
selection invert delete
select none delete the original
Repeat same above instructions for copy of raster 10 layer
Click on raster 9 selections,select all, float,defloat
paste a paper of choice from the kit - I used paper2
selection invert delete
select none delete the original
paste a paper of choice from the kit - I used paper2
selection invert delete
select none delete the original
Click on raster 5 back selections,select all, float,defloat
paste a paper of choice from the kit - I used paper3
selection invert delete
Add noise with setting of choice
select none delete the original
paste a paper of choice from the kit - I used paper3
selection invert delete
Add noise with setting of choice
select none delete the original
Repeat same above instructions for copy of raster 5 layer
Click on raster 3 back selections,select all, float,defloat
paste a paper of choice from the kit - I used paper6
selection invert delete
selections modify expand by 3
drop down a layer, add new layer and flood fill with white
repeat noise settings
select none delete the original
paste a paper of choice from the kit - I used paper6
selection invert delete
selections modify expand by 3
drop down a layer, add new layer and flood fill with white
repeat noise settings
select none delete the original
Click on raster 6 - increase settings to 100
selections,select all, float,defloat
paste a paper of choice from the kit - I used paper12
selection invert delete
select none delete the original
selections,select all, float,defloat
paste a paper of choice from the kit - I used paper12
selection invert delete
select none delete the original
Place your main tube
Xero radiance with settings of choice
Xero radiance with settings of choice
Now add any other elements of choice
I used the following:
Bead
Bottle
Button
Cat
Ribbon
Scattered hearts
Splats
I used the following:
Bead
Bottle
Button
Cat
Ribbon
Scattered hearts
Splats
Merge your layers & add mask
Place your name where you like it
Add the Copyright and your License Number for the tube
Resize to your liking and save as PNG
This tutorial was created on July 7, 2012 by Rhonda
Any resemblance to another Tag or Tutorial is purely coincidental
Add the Copyright and your License Number for the tube
Resize to your liking and save as PNG
This tutorial was created on July 7, 2012 by Rhonda
Any resemblance to another Tag or Tutorial is purely coincidental
Subscribe to:
Posts (Atom)
My Blinkie

My Licenses

